Jump to content

Pure Pen's Porthcurno


Bo Bo Olson

Recommended Posts

“””””With Pure Pens a proud Welsh company, developing Celtic-themed inks seemed entirely befitting. Many of the inks tend to sit in between other ink producers' main colours, giving fountain pen fans another unique palette to add to their collection.

Porthcurno Cove captures the crystal clear turquoise waters of this famous Cornish beach. Imagine a summer evening looking down on its bright blue-green (more washed out than bright on CT....) waters from the Minack Theatre, looking out to sea following the path of the transatlantic communication cables running under this very cove.

The ink shades with each downstroke, giving it a consistently vibrant appearance. It is bright enough to set itself apart from the everyday blue, while subtle enough for everyday writing.

It comes bottled in a retro-shaped 60ml glass bottle, which is hand-filled, hand-labelled and hand-sealed!”””””


It is a bit washed out…………. I think I like turquoise more on the blue side. It does shade.


Somewhere there is a turquoise I like more….Grumble squared !@#$%^&, that means I’ll have to ink 8-9 pens to find it.

OMG, I may have to open a vintage W. Germany Lamy Turquoise ink.YPbLvTV.jpg

Way back, a couple days after the Dawn of Time, (in my mind darker) I had bought Lamy Turquoise as my third  ink. It was a nice color but rather blaaa. I went into Ink Reviews, and there were only two reviews way back then....…… In Both, the ink SHADED. They were using 90g paper, not the 80g I had.

My fourth ink was that Waterman Turquoise.... I don't remember if it was Caribbean Sea or Florida blue. It's been an age and a half, and in the meanwhile Waterman changed all the names on me, so it wasn't worth trying to figure out which was which.


I had a small booklet of inks sent to me by the passed Piembi; once our Pelican expert and she had more MB’s than most too. The woman with Semi-flex nibbed pens. It was a 90g Oxford Optic booklet available in Frankfurt, but not in Heidelberg. Suddenly Lamy Turquoise was something special…it Shaded.

From then on, I hunted shading inks.


In reference to P. T. Barnum; to advise for free is foolish, ........busybodies are ill liked by both factions.

Ransom Bucket cost me many of my pictures taken by a poor camera that was finally tossed. Luckily, the Chicken Scratch pictures also vanished.

The cheapest lessons are from those who learned expensive lessons. Ignorance is best for learning expensive lessons.


Link to comment
Share on other sites

  • Replies 10
  • Created
  • Last Reply

Top Posters In This Topic

  • Bo Bo Olson

    4

  • LizEF

    3

  • yazeh

    1

  • senzen

    1

Top Posters In This Topic

Posted Images

Don't want to take picture....says too big. Will try other ways.

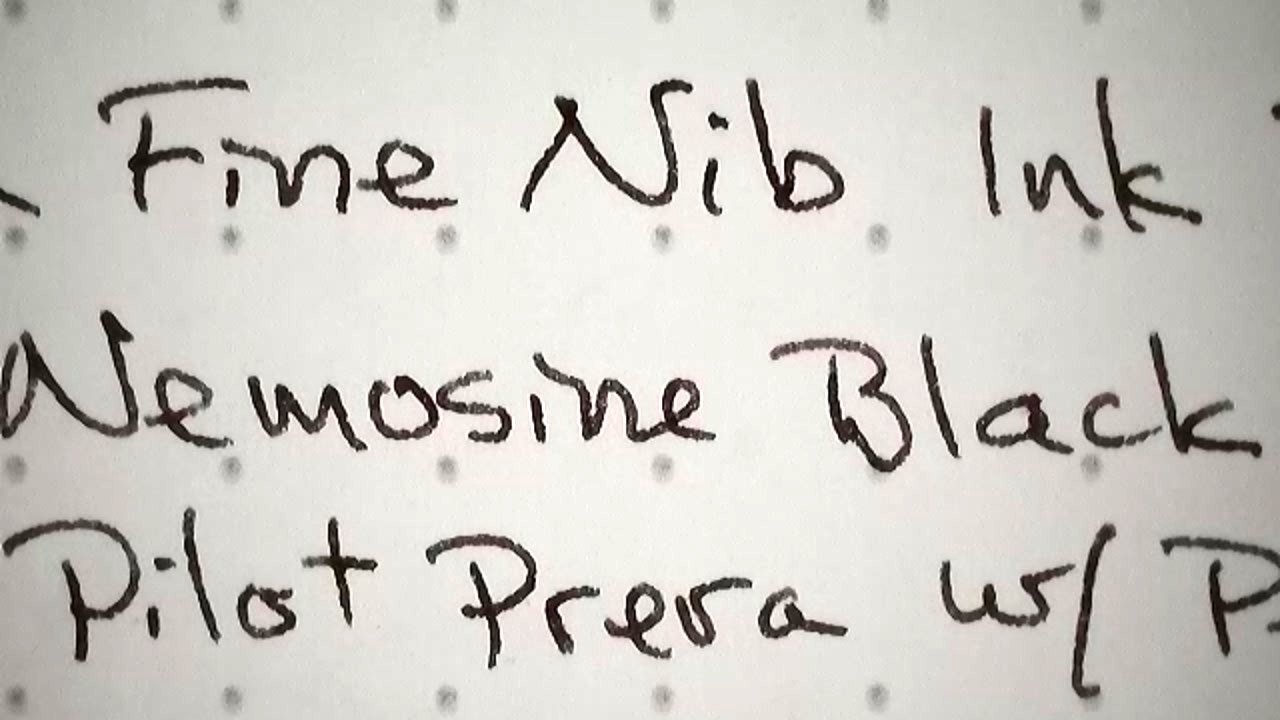
This picture is too blue.     In real life, it is more washed out.


If someone has this ink and a good paper, it would be nice to see the true color.

If it was this blue, I'd be more happy.

 This will be my last ink review....between my wife's handy/cell phone (not the newest phone camera) and the editing programs on my computer, I'm not getting the true view.

Does show the shading.

image.png.2a51827913ce856d257c9eed9c57e902.pngimage.png.7f4acbace0bdf87c323ae11a0e14dfa0.png

In reference to P. T. Barnum; to advise for free is foolish, ........busybodies are ill liked by both factions.

Ransom Bucket cost me many of my pictures taken by a poor camera that was finally tossed. Luckily, the Chicken Scratch pictures also vanished.

The cheapest lessons are from those who learned expensive lessons. Ignorance is best for learning expensive lessons.


Link to comment
Share on other sites

I find that desaturating a photo taken on my phone helps.

"The trouble with the world is that the stupid are cocksure and the intelligent are full of doubt."


B. Russell

Link to comment
Share on other sites

Interesting review. :thumbup: I would say trying taking photos, with northern window (i.e if possible) and see if you can get the colour right.  In my experience taking photos in sunlight or artificial light greatly changes the way the color is, (i.e., unless you want to show off sheen).  

Link to comment
Share on other sites

Oh, that’s a lovely colour in the photo.  I like the idea of it being more washed out in person, it looks like it shades really nicely. There’s lots of bright turquoise inks out there, a toned down one is appealing.

Top 5 of 25 currently inked pens:

MontBlanc 144 IB, Herbin Orange Indien/ Wearingeul Frost

Sailor 🐧 Mini Pro Gear Slim M, Van Dieman’s Neptune’s Necklace 

Pelikan M605 F, Pelikan Edelstein Moonstone

Wing Sung 698 SF, Pelikan Edelstein Golden Lapis/ Sapphire 

Cross Wanderlust Malta M, DeAtramentis Columbia Blue-Bronze-Copper 

always looking for penguin fountain pens and stationery 

Link to comment
Share on other sites

Here's a link to the Pure Pens page for "Porthcurno Cove".  It looks much more green on their website.


FWIW, @Bo Bo Olson, I took your top image, whitened the paper, and then tilted the color toward green in steps, slightly more green from left (least green) to right (most green).  Don't know if any of them looks closer to what you see, but they seem closer to the Pure Pens image.

large.FPNPorthcurno1.jpg.bf6f57a9ab98e261e783a399346e4547.jpg


If you want to talk about how I did this, I'm happy to - here or in a separate thread - it was actually really easy on a computer (don't know if it would be on a cell phone).


Thanks for another review!  Best wishes on your hunt for the perfect turquoise! :D

Link to comment
Share on other sites

Having called the wife in because of superior eyes, the left one was closest.:thumbup:

19 minutes ago, LizEF said:

If you want to talk about how I did this, I'm happy to - here or in a separate thread - it was actually really easy on a computer

Here would be good, there is bound to be someone as behind the moon as me.


You are right, it is a darker green in the picture they show.


Microsoft has Developer, which seemed easy, but wasn't as good as something I saw years ago.

There's another modern one (don't remember the name, but it's on my computer, that doesn't do as good as once upon a time.

.................

There are folks with the knack....and skill.

When looking at a picture at two of the three auction house I go to...one is seldom. Two of them make great pictures of worn out pictures.

The other, selling nothing but art, doesn't enhance the picture.

....................

You know you are someone, when years after your death, a signature on two, two-dollar bills brings big money...Andy Warhol.

At one time, way, way, way back in the day... When the City of San Diego got ancey with the major naval base there. The Navy would pay everyone in the Navy or working for the Navy, in two dollar bills, to show the city where their money was coming from.

In reference to P. T. Barnum; to advise for free is foolish, ........busybodies are ill liked by both factions.

Ransom Bucket cost me many of my pictures taken by a poor camera that was finally tossed. Luckily, the Chicken Scratch pictures also vanished.

The cheapest lessons are from those who learned expensive lessons. Ignorance is best for learning expensive lessons.


Link to comment
Share on other sites

20 minutes ago, Bo Bo Olson said:

Here would be good, there is bound to be someone as behind the moon as me.

I use GIMP, which you can find on their website or in the Microsoft Store.  It is free.


It does a lot.  But you won't need it all.  I closed all the toolbars and similar windows and just work with keyboard shortcuts and menus.  (You can adjust the user interface, including keyboard shortcuts, to make it look less busy and simplify matters.)


Here are the steps I followed:

  1. Load the image (I usually drag and drop into the window, but File > Open works)
  2. View > Zoom > Fit Image in Window (or you can use the zoom drop-down in the lower left corner)
  3. Colors > Levels (this opens a dialog)
  4. In that dialog (see below), I adjust the page whiteness in one of two ways - you can experiment to see which one you like better: First, you click on the white eyedropper toward the lower right of the dialog (I put a red box around it in the screen capture below).  This is what I did with your image, using the eyedropper to select the paper where it looked the lightest, to say "that should be white".  Second, you change the number in the box on the right under the "Input Levels" graph-like display (again, I put a red box around it).  I didn't use this method to adjust your image.  You can also just play around with the controls in this dialog to see what they do.  Hit the "Reset" button to start over.  Once you like what you see, click OK.  NOTE: This just adjusts the lightness and darkness of the elements, it does not change the colors.  You can make darks darker or lighter, you can make lights lighter or darker.  Feel free to ask questions.
  5. If the color actually needs to change, go to Colors > Hue-Saturation (this opens a dialog, see below)
  6. In that dialog, I almost always go straight to the "Adjust Selected Color" section (without selecting a color, so it just adjusts the overall color).  See the screenshot - I put a red box around the sliders I use - though it's easier to tab to the control and use the arrow keys to move by whole numbers.  Use Hue to change the color (e.g. I adjusted it to the left - a negative number to go greener - just play and you'll see how the colors change).  Lightness will make everything look more pastel (to the right) or greyed (to the left), as if you were looking through a white or grey veil at the page, if that makes sense.  Unlike the Levels dialog in #4 where the changes impact only the lighter or darker colors (depending on which control you use), here it's the whole image getting lighter or darker.  Saturation with change the color intensity - easiest just to play and see what it does.
  7. When I can't get the colors to match with the Hue-Saturation dialog, I'll sometimes try adjusting the colors separately (at the top of that dialog) or using one of the other top items in the Colors menu: Color Balance, Color Temperature, or Hue-Chroma.  I don't use those much, so I won't go into them in detail for now.  I recommend just opening the dialog and playing to see what it does.  They all include a "Reset" button so you can start over. :)  I did not use any of these to adjust your image - just the Levels dialog from #3 and #4, and the Hue-Saturation dialog to adjust the Hue.
  8. When you're done, you don't "save" like normal programs, you export: File > Export.  It will assume the same file type as you loaded.  You can use the same name or a different one.  Using a different one lets you preserve your original in case you decide you want to try different adjustments.  By default, it exports to the same folder/directory as the original file.

Levels dialog (left) and Hue-Saturation dialog (right)

large.GIMPDialogs.jpg.8b7a8fb7f226a4e5b40dddc9e806b50e.jpg


Hope that helps!

Link to comment
Share on other sites

I have copied that to Word to print out.

Got to hold that in front of my beak and hunt and peck. Even a blind chicken finds a grain of corn occasionally.

Thanks.

In reference to P. T. Barnum; to advise for free is foolish, ........busybodies are ill liked by both factions.

Ransom Bucket cost me many of my pictures taken by a poor camera that was finally tossed. Luckily, the Chicken Scratch pictures also vanished.

The cheapest lessons are from those who learned expensive lessons. Ignorance is best for learning expensive lessons.


Link to comment
Share on other sites

Another quick'n'dirty trick photographers use is to have a neutral gray card or colour card to use with photographs.  This works pretty well with scans, too.  One can purchase a nominal 18% neutral gray card in pocket sizes or larger, online or in a moderately good art store or most photography shops.


The difficulty with adjusting hue/saturation for most people is that their monitors are not calibrated correctly with respect to colour.  The user has to differentiate colour balance (or for those folks who get more into this, colour temperature) by their own eye.  This is then compounded with the image file type (e.g., TIFF, JPEG) that the image is saved into (and we're not going to delve in colour gamuts here).  Decent digital cameras allow a person to fine tune colour temperatures or use more coarse adjustments (e.g., "daylight"), which limit the hue/saturation stuff to adjust with Photoshop, GIMP, or other packages.


If a person takes a quick image of a neutral gray balance card or includes it on the side of a photo or scan of an ink test, most photo editing packages will allow for the use of a sample, often done with an eyedropper icon in packages like Photoshop, and make an overall adjustment of the image.  I'll omit a detailed list of the steps one takes to reach that sample and adjustment in the interests of (relative) brevity.


As mentioned, this is a quick'n'dirty approach to the adjustments, but it's generally good enough to get the ink colour pretty close to "reality" with minimal effort/time needed.  Debates on what constitutes "reality" will be addressed elsewhere, sometime, some day...  but not here, now, or today.


John P.


P.S.  Most decent introductory digital photo training sites will have more comprehensive discussions on all of these topics.  FPN is, after all, a pen, ink and paper forum...  <warm smile>

Link to comment
Share on other sites

3 hours ago, Bo Bo Olson said:

I have copied that to Word to print out.

Got to hold that in front of my beak and hunt and peck. Even a blind chicken finds a grain of corn occasionally.

Thanks.

:) You're welcome!

Link to comment
Share on other sites

Create an account or sign in to comment

You need to be a member in order to leave a comment

Create an account

Sign up for a new account in our community. It's easy!

Register a new account

Sign in

Already have an account? Sign in here.

Sign In Now


×
×
  • Create New...