Jump to content

3D-Printing Replacement Parts


WestLothian

Recommended Posts

18 hours ago, Lamy4life said:

 CNC kitchen has a fun video about it too. Good luck, It can be quite a challenge from what I heard. 

 https://youtu.be/9qb25Gi4Jv0

A very useful video, thank you for sharing the link.


For optimising the strength, I was already using the low-speed print settings, the increased print width and of course the 100% infill. However, for pen components I was using concentric as the infill pattern and used multiple perimiters for the walls. CNC has made some impressive mechanical strength and toughness test machines beyond the scope of a home workshop!


The start and end of each layer creates a vertical seam that you can try to hide under a clip or you can set the software to randomly scatter the little bumps. The finish can be very regular if you set the speed low and avoid any vibrations from the filament spool etc. Threaded sections need some plannning to get enough layers to define the profile within a pitch.


This is a metric M6 example with a 1.00 mm pitch

1930791385_M6threadtestpiece.thumb.jpg.47e269b71cfa61a711b186c3cfaa7784.jpg


1984741769_SheafferTemporaryCap.thumb.JPG.83390ea35f3d48e00b41135e246dadce.JPG


The temporary cap for the Sheaffer was very regular in texture then some unexplained bumps appeared.


Link to comment
Share on other sites

  • Replies 51
  • Created
  • Last Reply

Top Posters In This Topic

  • WestLothian

    21

  • Lamy4life

    12

  • IThinkIHaveAProblem

    4

  • es9

    3

@WestLothian

The Random bumps would be the Z seam, they are quite hard to get rid of. I found that glitter fillaments help distract from the z seam or adding some ribbing to the model. There are resins or finishes that you can also apply to the pen. 

I don't care too much about strength as I have a few knock around pens and baby the rest of my collection. 

I have been able to be able to get .5mm details on a FDM printer, I have gone smaller but they tend to be incredibly fragile. 

Link to comment
Share on other sites

1 hour ago, Lamy4life said:

@WestLothian

The Random bumps would be the Z seam, they are quite hard to get rid of. I found that glitter fillaments help distract from the z seam or adding some ribbing to the model. There are resins or finishes that you can also apply to the pen. 

I don't care too much about strength as I have a few knock around pens and baby the rest of my collection. 

I have been able to be able to get .5mm details on a FDM printer, I have gone smaller but they tend to be incredibly fragile. 

I deliberately placed the z-seam at a known position using the slicer software. This is the vertical seam that I described in the above post, shown in the thread model and at the rear of the cap in the photo. Therefore, these random bumps are something different from the z-seam start/end.


The details required for these threads to be successful are more like 0.05mm in the x,y, placement and then placed with a 0.1mm layer height. They are, as you say incredibly fragile features and can only work if successfully fused with the surrounding material as described in the CNC Kitchen video.

Link to comment
Share on other sites

Ahhh, Gotcha. I guess if you see details in that sense I do go to .05mm detail. I personally use .7mm layer height It might be fun to make an eyedropper.

It could be z-wobble on the printer, I do see a bit of ghosting on the model.  I'll link something about zits on models too

https://all3dp.com/2/3d-print-zits-tips-tricks-to-avoid-blobs/ 

It could also be due to slicer settings, I found I got similar zits on mine due to Arachne. 

A 3d printed fountain pen is one of my side projects at the moment. 


Link to comment
Share on other sites

Thanks again for the excellent link. There are certainly plenty of parameters to investigate to get rid of those final few zits. I am still using the original nozzle and I have not experimented with retraction travel, so it could be an over-extrusion deposit that eventually drops from the side of the nozzle. The appearance of some of the defects can be a bit like a spooling error on a cable drum with no over-extrusion. Everything lies parallel until one layer of the outer wall is incorrectly placed. I was printing in the "inside to outside" order to help with thread overhangs. There is a note in Cura (I think) that "outside to inside" is better for finish and accuracy but worse for overhanging features.

Link to comment
Share on other sites

1113793961_SheafferPenCapBestPrint.thumb.jpg.a8b42d69e5cd98dd5167958d21e5f198.jpg


I now have a print free of the dreaded pimples or zits.

This was achieved after I cleaned all round the print nozzle area, cleaned and added Molykote DX to the z-screw, rechecked belt and guide wheel tensions, reduced the filament retraction and kept everything else as in my Pen Parts printing profile. Some deliberate chasing or texture could be added to the surfaces to make a Waterman 12 style eyedropper. I have quite a collection of early "Ideal" size 2 nibs needing new homes. 

Link to comment
Share on other sites

10 hours ago, es9 said:

Have you thought about vapor smoothing exterior parts like caps and barrels? 

I personally don't fancy the fumes or environmental impact of those solvents.


I have used boiling brine as a pour-over polish to get a gloss on the surface, but I think the best solution is to keep texture and perhaps even add more as a mill, knurl, or chasing pattern feature in the 3D model. This would disguise process marks and also and scratches in future handling or use.


2135474603_SheafferTexturePrint.thumb.jpg.16349e45afaf6889e5e453d9c38ac21d.jpg

Link to comment
Share on other sites

I reverse engineered a Waterman #52 feed to create a computer model.


2096899625_Watermans2Feed.thumb.jpg.41fae35cd7e89b0aee6c173550394809.jpg


I kept everything the same apart from increasing the surface area of the bottom the channel to compensate for the plastic being harder to wet than ebonite.


365871795_Watermans2FeedFacsimile.thumb.jpg.c0d3724c2630323c6ab423dece16ef89.jpg


It fitted without any adjustment or sandpaper and I left the print texture for acting as a collector of sorts. The print layer height was 0.075mm. A brim and supports were placed below the channel, out of sight for any trimming. The feed was dipped in boiling water and squeezed against the nib for a good contact, just like I do on ebonite.


I will move on to a Pelikan 100N next. They are a bit more modern and have mor features to include. They tend to break fins underneath which makes good spares very hard to find.

Link to comment
Share on other sites

On 2/15/2023 at 12:14 PM, WestLothian said:

1113793961_SheafferPenCapBestPrint.thumb.jpg.a8b42d69e5cd98dd5167958d21e5f198.jpg


I now have a print free of the dreaded pimples or zits.

This was achieved after I cleaned all round the print nozzle area, cleaned and added Molykote DX to the z-screw, rechecked belt and guide wheel tensions, reduced the filament retraction and kept everything else as in my Pen Parts printing profile. Some deliberate chasing or texture could be added to the surfaces to make a Waterman 12 style eyedropper. I have quite a collection of early "Ideal" size 2 nibs needing new homes. 

Ahhh, thats more like it! such a clean print :)

I am a bit weary of making eyedropper pens, I tend to have alot of trouble with them burping, granted most of them are modern. I might give it a shot if I can find some vintage nibs. I am still new to vintage pens but have a few :) 

Minabenko has a write up on 3d printed nib units and has tried to print feeds for 3776s

https://www.minabeko.com/mainarticles/3d-printed-nib-unit-primer 

As or vapor smoothing ASA is nice as it can be done with IPA which dosen't have too strong of fumes. Yup, adding a pattern feature not only helps the model look nice but it would also help the stength of the model. Just be careful to make sure they are comfortable.
https://www.instagram.com/p/Cmjp0oMr181/

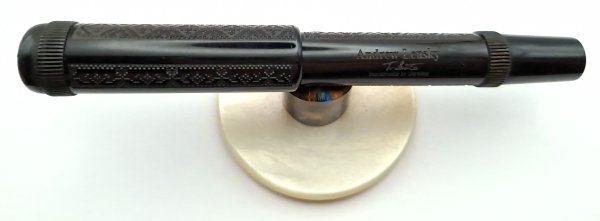
Here is the pen I printed for the secret santa. I tried to put a resin on it as it was a bit uncomfortable. It worked ok, I can't remember why I covered the body in resin. my later versions don't have it, I was quite stressed at the time so I probably was overthinking haha

Link to comment
Share on other sites

Lamy4life


Thats a nice secret santa pen with plenty of good texture for grip.


The burping problem is common to all my old early 20th century eyedroppers. I warm them by hand with the nib upright before writing which helps expand the air withou the burp. These feeds did not have any spoon, collector or fins of any kind to catch an over-flow of ink from the barrel so the only excape is a splash of ink directly on your writing.


My model of the Pelikan feed from about 1935 has spoons and collector fins.


1795902032_Pelikan100FeedModel.thumb.jpg.61a921d989a67f23c9e88625718cc373.jpg


First prints were not great. I think that I will add my own supports in the CAD model rather than letting the slicer software miss important details and add clutter in the areas that are hard to trim such as the feed channels or fins. I experimented with 0.05mm layers today and the small steps made for a great ebonite appearance with only 30 minutes print time.


Thanks again for the article link.


Link to comment
Share on other sites

@WestLothian

Happy to help

For supports, you could try tree supports. I think you could print with out supports on the model tho


You would have to remove the square cuts or chamfer them. The largest overhang I model for is 45 degree tho many printers can go past that. 


Ah, thanks for the tips on burping pens. It can be quite frustrating at times. 


Link to comment
Share on other sites

3 hours ago, es9 said:

If you haven’t already seen this site, you might want to take a look. Tl;dr: The texture on the surface is important. 


Thanks for that good link. The feeds all work well. The fine print layers are wetting well and are hydrophilic or ink-loving surfaces. The 100 Pelikan got a good testing fitted to an Esterbrook pen today.

Link to comment
Share on other sites

I know very little about 3D modeling and printing, so this may be a really dumb question, but where do I get the "Cura" you are referring to?


Thank you.


Glenn Atkins

Link to comment
Share on other sites

10 hours ago, Glenn Atkins said:

I know very little about 3D modeling and printing, so this may be a really dumb question, but where do I get the "Cura" you are referring to?


Thank you.


Glenn Atkins

 It is available as a free version to download from this link  https://ultimaker.com/software/ultimaker-cura


Link to comment
Share on other sites

1 hour ago, WestLothian said:

 It is available as a free version to download from this link  https://ultimaker.com/software/ultimaker-cura


Thank you, and I should have asked this as part of my first question, where are the best places to start learning about 3D printing?


This is really an interesting thread but it all sounds like a foreign language to me.🙃


Thanks.


Glenn Atkins

Link to comment
Share on other sites

1 hour ago, Glenn Atkins said:

Thank you, and I should have asked this as part of my first question, where are the best places to start learning about 3D printing?


This is really an interesting thread but it all sounds like a foreign language to me.🙃


Thanks.


Glenn Atkins

This might be a way to start: https://en.wikipedia.org/wiki/3D_printing


There are many youtube video guides and tutorials that cover specific printer machines. If you don't have a printer it will sound very foreign. Learning by trial and error is not too costly.


To really get the best from the technology you will also need to develop skills in mechanical engineering design software to create the part geometry. The best software is very expensive, but fortunately there are working alternatives that have been developed as open-source modellers. I like FreeCAD because it is parametric and retains the construction features and sketches for redefining and optimising, a bit like the PTC Creo or ProENGINEER software without the $$,$$$  " FreeCAD offers tools to produce, export and edit solid, full-precision models, export them for 3D printing or CNC machining, create 2D drawings and views of your models"

Link to comment
Share on other sites

@Glenn Atkins

It depends where you are but some libraries have 3d printers that you can use. If you're able to get a 3d printer and get used to it. It takes quite some time to learn to 3d model. 

Fusion360 has a free plan for hobbyists and has some limits. I have heard of people also using blender. 

if you don't mind me asking what about 3d printing intrigues you? 


Link to comment
Share on other sites

1 minute ago, Lamy4life said:

@Glenn Atkins

It depends where you are but some libraries have 3d printers that you can use. If you're able to get a 3d printer and get used to it. It takes quite some time to learn to 3d model. 

Fusion360 has a free plan for hobbyists and has some limits. I have heard of people also using blender. 

if you don't mind me asking what about 3d printing intrigues you? 


Always had a fascination generally and would be an interesting skill to learn, modeling and printing.


Glenn Atkins

Link to comment
Share on other sites

Create an account or sign in to comment

You need to be a member in order to leave a comment

Create an account

Sign up for a new account in our community. It's easy!

Register a new account

Sign in

Already have an account? Sign in here.

Sign In Now


×
×
  • Create New...