Jump to content

Diy Montblanc Ballpoint Pen Adaptor


austollie

Recommended Posts

Some years ago, Montblanc changed the size of its standard ballpoint refills. For those who write with older Montblanc ballpoint pens (and I am a keen collector of pen sets in the 1970s Carrera and Caressa line and like the idea of matching ballpoints for my beloved fountain pens), modern refills will be too short. This does not apply to four colour ballpoints, where the standard D1 refill is still in use and readily available today.

In this post, I will show you some options to make your own adaptor. Picture 1 show the dimensions of the adaptor in millimetres, the old and new refills side by side (the shorter one being the modern replacement) as well as four options for an adaptor. The options of arriving at a suitable adaptor are:


a: Purchase a genuine Montblanc adaptor on ebay or similar platform. These are no longer sold by Montblanc, as far as I am aware;

b: Pull the plastic end bit out of an old refill and insert a 3mm plastic or metal rod (if you don’t have any, your local hobby shop will be able to help). Then glue plastic bits around the rod, until the length of the body is 14 millimetres, as shown in the diagram. The plastic bits act as a spacer;

c: Use a 3mm rod as per b above and insert in the end bit from an old refill, but do not glue plastic bits around the outside (i.e. no spacer). Then insert the other end of the 3mm rod into the modern refill and shorten until the combined length is the same as an old refill and you’re done (this will take you no more than 5 minutes). I am not a fan of this method, because you’re relying on getting the length of the rod exactly right. If the indentation in the next refill that you buy is different to the one that you used when you made the adaptor, the adaptor will no longer work;

d: Make an adaptor from scratch. I will explain how to do that. It takes less time than it took me to write this post


post-152162-0-76572700-1579150170_thumb.jpg


I have used 3mm diameter polystyrene rod (old sprue) and 1 millimetre thick polystyrene, because that’s what I had to hand. You can adapt this to suit the materials that you have available. Most people will have all the materials in the home that are needed for this. It’s a case of getting creative. The tools you need are:

  • A box cutter to cut the polystyrene (or other material) into strips;
  • A punch for punching out a polystyrene end cap (you can improvise if you don’t have one);
  • A set of tweezers (not essential);
  • A suitable adhesive or solvent. I used MEK (methyl ethyl ketone) for solvent welding everything together, but I learned in this forum that’s no longer available in California. You can use any other glue. If you do use MEK, please only use this in a well ventilated area;
  • A drill (not essential).

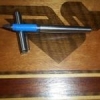
post-152162-0-67196400-1579150222_thumb.jpg


The steps are:

  1. Cut a 13 millimetre wide strip of polystyrene (we’re aiming for a total width of the body of 14mm and I’m allowing 1mm for the end cap. If you’re using thinner polystyrene, then cut the strip longer);
  2. Cut the 13 millimetre strip of polystyrene into thin (1.5 millimetre or so wide) strips.
  3. Glue the 13 by 1.5 millimetre strips around a 3mm to 3.5mm diameter polystyrene rod (I used old sprue). If you’re using epoxy glue, you can use metal rod instead.;
  4. Punch out a 6 to 7mm diameter end cap out of the polystyrene and glue into place;
  5. Wait for the glue to set and then insert the 3mm rod end into a drill chuck and hold a piece of sandpaper to the end cap until it has the right shape. You can do this by hand, if you do not have a drill.

That’s it. You’re done. See below for my 1970s Montblanc ballpoints.


post-152162-0-41065300-1579150253_thumb.jpg

Edited by austollie
Link to comment
Share on other sites

  • Replies 7
  • Created
  • Last Reply

Top Posters In This Topic

  • austollie

    3

  • mikerph

    1

  • OCArt

    1

  • muggins2003

    1

Top Posters In This Topic

Posted Images

Thanks for posting this, I don't have a use for lt right now but will file it away for the future.

...............................................................

We Are Our Ancestors’ Wildest Dreams

Link to comment
Share on other sites

I stated a similar modification for new refills in the montblanc S line ballpoints. The new refills are the right length but the indentation in the top is deeper; I took a thin plastic advertisement pen refill and cut a small section off the end and used the remaining refill to press the piece into the top of the montblanc refill, it is snug enough to remain in place and allows the refill to work properly in the pen . The refill will work in modern pens without removing the shim.

Secundum Artem

Link to comment
Share on other sites

  • 1 year later...
On 1/16/2020 at 4:57 AM, austollie said:

Some years ago, Montblanc changed the size of its standard ballpoint refills. For those who write with older Montblanc ballpoint pens (and I am a keen collector of pen sets in the 1970s Carrera and Caressa line and like the idea of matching ballpoints for my beloved fountain pens), modern refills will be too short. This does not apply to four colour ballpoints, where the standard D1 refill is still in use and readily available today.

In this post, I will show you some options to make your own adaptor. Picture 1 show the dimensions of the adaptor in millimetres, the old and new refills side by side (the shorter one being the modern replacement) as well as four options for an adaptor. The options of arriving at a suitable adaptor are:


a: Purchase a genuine Montblanc adaptor on ebay or similar platform. These are no longer sold by Montblanc, as far as I am aware;

b: Pull the plastic end bit out of an old refill and insert a 3mm plastic or metal rod (if you don’t have any, your local hobby shop will be able to help). Then glue plastic bits around the rod, until the length of the body is 14 millimetres, as shown in the diagram. The plastic bits act as a spacer;

😄 Use a 3mm rod as per b above and insert in the end bit from an old refill, but do not glue plastic bits around the outside (i.e. no spacer). Then insert the other end of the 3mm rod into the modern refill and shorten until the combined length is the same as an old refill and you’re done (this will take you no more than 5 minutes). I am not a fan of this method, because you’re relying on getting the length of the rod exactly right. If the indentation in the next refill that you buy is different to the one that you used when you made the adaptor, the adaptor will no longer work;

d: Make an adaptor from scratch. I will explain how to do that. It takes less time than it took me to write this post


post-152162-0-76572700-1579150170_thumb.jpg


I have used 3mm diameter polystyrene rod (old sprue) and 1 millimetre thick polystyrene, because that’s what I had to hand. You can adapt this to suit the materials that you have available. Most people will have all the materials in the home that are needed for this. It’s a case of getting creative. The tools you need are:

  • A box cutter to cut the polystyrene (or other material) into strips;
  • A punch for punching out a polystyrene end cap (you can improvise if you don’t have one);
  • A set of tweezers (not essential);
  • A suitable adhesive or solvent. I used MEK (methyl ethyl ketone) for solvent welding everything together, but I learned in this forum that’s no longer available in California. You can use any other glue. If you do use MEK, please only use this in a well ventilated area;
  • A drill (not essential).

post-152162-0-67196400-1579150222_thumb.jpg


The steps are:

  1. Cut a 13 millimetre wide strip of polystyrene (we’re aiming for a total width of the body of 14mm and I’m allowing 1mm for the end cap. If you’re using thinner polystyrene, then cut the strip longer);
  2. Cut the 13 millimetre strip of polystyrene into thin (1.5 millimetre or so wide) strips.
  3. Glue the 13 by 1.5 millimetre strips around a 3mm to 3.5mm diameter polystyrene rod (I used old sprue). If you’re using epoxy glue, you can use metal rod instead.;
  4. Punch out a 6 to 7mm diameter end cap out of the polystyrene and glue into place;
  5. Wait for the glue to set and then insert the 3mm rod end into a drill chuck and hold a piece of sandpaper to the end cap until it has the right shape. You can do this by hand, if you do not have a drill.

That’s it. You’re done. See below for my 1970s Montblanc ballpoints.


post-152162-0-41065300-1579150253_thumb.jpg

Hi, Any chance you'd know the dimensions of the adapter. I have a 3D printer and would like to make one for my MB noblesse ballpoint pen. Thanks!

Link to comment
Share on other sites

Hi Muggins2003,


Yes, I do know the dimensions.  Please refer to the sketch in the first photo.  The main thing is to get the thicker portion right (14mm in length in total).  The other dimensions are not that critical (but are also shown in the photo and evident from the description).  As far as the thinner section is concerned, as long as it fits in the refill, it'll work (and if it's too long, you can cut a bit off).


Please post a picture of the 3D printed adaptor.  I'd love to see it.


Cheers,


Ollie

Link to comment
Share on other sites

Please let me know if it works out for you and if you can make one for me, I'd like to buy one, too. I got a ballpoint one for my mom but no such luck in finding a compatible refill. Thank you.

Link to comment
Share on other sites

  • 3 years later...

Ok. I know I'm reviving a dead thread, but encountered this issue and found really simple solution on https://timetowrite.nl/


When you get a modern refill, they come with a plastic piece covering the tip. Remove the cover, and from the closed end, cut a piece 14mm long. Insert this piece into the pen with the closed end at the top (closest to the button) and open end on the refill.  Takes seconds and seems to work like a charm. You don't need precises measurements. I simply laid the old one beside the new one, then inverted the cap at placed it at the top of the new refill, marked where it met the old one, and cut.  Fitted it to the pen and it works well.  If you use calipers and are really careful about cutting, will take you one minute.  My hack and slash method - 15 seconds.


If you try this method, some tips.

  1. The plastic protective covers are a bit brittle.  I found that wrapping a piece of tape around the piece you want to save. It helps prevent the cap from cracking.  I left the tape on and there is no adverse effect.
  2. Remember to put the closed end to the top (button) part of the pen.  If you get it reversed, it will get stuck and not work.  A gentle tap and it will fall out.
  3.  If you cut the piece too short, it's not a big deal as long as it is close.  Since I eyeballed my measurements, the first time I did this I cut the piece about 1 - 1.5 mm short.  It still works and writes fine. If a minor variance bothers you, Montblanc sells refills in 2 packs.  So, you can grab the cap off the other refill and try again.  For me, I'll live with it for now and fix it once this refill uns out.


And I'm not kidding about taking seconds to do. Took me much longer to write this post.

Link to comment
Share on other sites

Hi Pan5N3,


Thanks for sharing your method and posting it here.  There are many ways to address the issue and it's good to have them all in the one place, so people can choose the one that works best for them.


Link to comment
Share on other sites

Create an account or sign in to comment

You need to be a member in order to leave a comment

Create an account

Sign up for a new account in our community. It's easy!

Register a new account

Sign in

Already have an account? Sign in here.

Sign In Now


×
×
  • Create New...