Jump to content

Mabie Todd Swan Sf1


FPRebel

Recommended Posts

I recently purchased a Mabie Todd Swan SF1. I knew it would need sac replacement, but if I'd done all of my homework, I would not have chosen the SF1 to attempt this for the first time! Still, here I am.


Please advise or refer me to existing information for this specific model (I haven't found it) for: 1) removing the section, 2) replacing the sac, 3) pulling the nib, if possible 4) Is there a reasonable way to recondition the clip?


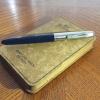
The cap closes with only a quarter turn although all parts (cap, body, feed, section) are labeled SF1. Near the base of the barrel is imprinted, "1 S-F MED" I'm attaching pictures; from one of them you'll see how far I've been able to pull the section. 5) By any chance, is the section inside the barrel fluted? It feels like it when I try to pull it out.


Sorry about the image color. For reference, the pen is photographed against a Leuchtturm page.


Thank you in advance for help.

post-129742-0-55547100-1491948787_thumb.jpg

post-129742-0-40268000-1491948822_thumb.jpg

post-129742-0-94789000-1491948951_thumb.jpg

post-129742-0-91360500-1491949062_thumb.jpg

post-129742-0-87589100-1491949096_thumb.jpg

post-129742-0-86979100-1491949207_thumb.jpg

post-129742-0-69088900-1491949319_thumb.jpg

post-129742-0-68173200-1491949343_thumb.jpg

Link to comment
Share on other sites

  • Replies 12
  • Created
  • Last Reply

Top Posters In This Topic

  • FPRebel

    5

  • PaulS

    4

  • Goudy

    3

  • northlodge

    1

Top Posters In This Topic

Posted Images

Should I forget trying to restore this pen and use it as a dip?

Lesson-learned!

Link to comment
Share on other sites

I understand this pen to be a pretty standard leverfill pen to work on.


You should not encounter much by way of unexpected difficulties, and as such the general advice given for all lever fill repairs will apply.


That said you are still going to need an understanding of the anatomy of such pens, the necessary spare parts (possibly just a sac / shellac / dusting powder), and a few basic tools.

Link to comment
Share on other sites

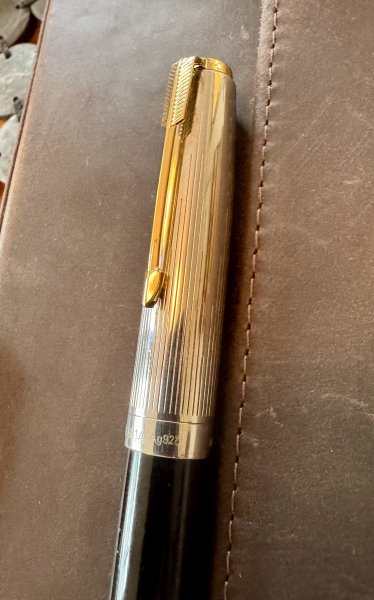
you should stick with dry heat - from hair dryer - applied to the barrel in order to complete the removal of the section - don't try pushing the section back in - you may crack the barrel. This design of clip is called an accommodation clip - it should slide off the cap with gentle pressure, and then it can be cleaned if you want it to look pristine - even re-plating is a possibility.

I'd agree, there shouldn't be any complex hidden dangers with this pen - don't force the lever until you've removed the section and old sac - you might end up with a bent lever.

Sac removal is obvious, but you will need some shellac if you're going to replace with a new one - available on the internet, and when fitted put some plain talc on the sac to help avoid any stickiness from surplus shellac.

Remember - when pushing section back into barrel, again use dry heat on the barrel to provide sufficient expansion to prevent cracking of the barrel lip.

Best of luck.


P.S. just realized we didn't comment on nib removal. If you flush the nib/feed from the rear end of the section, and you're satisfied the ink channels are clear etc., then would seem unnecessary to knock out the nib/feed. After applying some dry heat to the section (would not recommend water), it's then easy to knock these things out - but, the down side is that putting them back can be problematic, and often they don's seat as well as originally. Unless it's essential to knock them out, would suggest you don't. This is an old pen, and experience and care is needed if they are to be dismantled.

Edited by PaulS
Link to comment
Share on other sites

I agree with everything PaulS said. Gentle heat and much patience will get the section free. You could use rubber gloves to get a better grip but don't use any tools such as pliers.


By any chance, is the section inside the barrel fluted? It feels like it when I try to pull it out.


There are no grooves on the section of this pen where it enters the barrel (at least, there weren't on my SF1). I used an embossing heat gun, which gives a more controlled, directional stream than a hair dryer. Check that you're not overheating the pen by holding it to your lips occasionally.


Be careful not to over-tighten the cap. You can easily end up with a crack on the cap lip.


http://i.imgur.com/utQ9Ep9.jpg

Link to comment
Share on other sites

Many, many thanks to each of you, especially Paul & Goudy, who gave specific information.

Success! I slipped the SF1 section from the barrel yesterday evening. Oddly, heating it with a hairdryer caused it to stick even tighter; it would not budge. So I tried the opposite approach, 15 min in the refrigerator. Then with a gentle but steady pull the section came right out. (I won't attempt putting it back together until the pen is ready, but then I will try this same slight cooling.)

No sac was attached. After carefully probing with a Qtip, there doesn't seem to be anything still in the barrel, adhered to the walls or stuck to the bottom, but how can I be sure?

The lever feels fragile, however, it and the bar in the barrel appear to be working correctly.

Please look at the attached pic, the back of the section ends in threads (not a smooth nipple). It doesn't look like anything was ever sheared off.

Is this normal for this pen? The sac fits over the threads? What size sac? (The sticky with Richard Binder's sac guide doesn't include MTs)

I'm brand new to this forum, but grasping an understanding of the anatomy of this pen before proceeding is why I'm here. I appreciate antiques of all varieties and believe that preserving/restoring their authenticity is paramount. I have talc from Anderson Pens purchased for an earlier project. I have proper shellac (from IndyPenDance) since I converted my KawecoSport to a bulb-filler. I don't have pen tools, but absolutely promise not to use pliers or other harsh methods.

Thank you for the guidance members of this forum can provide!

post-129742-0-87951500-1492088464_thumb.jpg

Link to comment
Share on other sites

Can't see too well from your photo but would suggest those aren't threads on the sac nipple. Some manufacturers created a serrated or incised feature on nipples and section collars - the idea being that such things would provide extra grip when assembled.

Before rejoining section and barrel smear a very thin trace of silicone grease inside the lip area of the barrel - this should help to make re-entry smoother.

If you can't see inside the barrel, try a small torch which has a pin-point beam - there are purpose made small inspection lights but no idea as to cost.

Can only imagine someone has been here before you and cleaned the sac nipple of any previous remains of the old sac. You should measure the diameter of the nipple, and then fit a sac one size smaller - at least that's the advice, and apparently there's a formula suggested by The Pen Sac Company - but off-hand I forget what it is. Perhaps someone else will have the link, it's probably something like a 16 or 18 that you need, but best to check first. You could buy a small pack of various sizes which should guarantee you get the correct one.


These English made accommodation clips are less attractive than their States counterparts, where they were of a similar style but gold filled, although as is often the case they end up brassed in places............... I've examples which include the Swan trade mark, which I don't believe the British examples did.

The full Rd. No. on your clip reads 676026, and was a design Registered with the British Board of Trade some time in April 1920.

Link to comment
Share on other sites

Before attaching a sac, now would be a good time to flush the feed, which may have some dried ink in it. The easiest way to do that it to attach one of these section flushing bulbs over the sac nipple and use it to draw up and expel water or a solution of pen flush:


http://i.imgur.com/BlT7QBW.jpg

http://i.imgur.com/utQ9Ep9.jpg

Link to comment
Share on other sites

have just checked some early l.f. Swans, and the grooves around the sac nipple are definitely nothing to do with threads - they simply go round the peg rather than spiralling as proper threads would - so appears their purpose is simply to aid gripping the sac. On a clean pen they're deeper than I'd realized, and no doubt served their purpose well.

Always fatal to generalize, but as a feature they seem confined to pens prior to about 1930 (but obviously not on e.ds.), after which the pegs are designed with a flange around their extremity, over which the sac would be pulled. Combined with shellac this later design was perhaps seen as an easier production method, but I'm really on guessing with that comment.


Goudy - can you say where you sourced your flushing bulbs?

Edited by PaulS
Link to comment
Share on other sites

Thank you, Goudy and Paul, for more great information and suggestions!!!

Yes! On closer inspection, the section "threads" I was concerned about aren't threads at all, but ridges as you said. This makes me extremely happy, learning that my "new" SF1's section is intact. Thank you! Thank you!

You answered a question I had, Goudy, about how to clean the feed without removing it and without soaking the bchr section in water. Excellent! Now, where did you get the flushing bulb? Might a bulb syringe from a pharmacy work as well so long as I don't let water drip over the section? Cleaning the feed and nib might be the most tedious and time-consuming part of this.

Oh, and the clip seems tightly stuck . If I didn't know better, I'd think it was cemented onto the cap. It does however have the Swan logo, but the whole clip is badly brassed. What material is this once-silver-now-severely-brassed British clip?

Thanks, y'all!!! Thank you so much!!

Link to comment
Share on other sites

Create an account or sign in to comment

You need to be a member in order to leave a comment

Create an account

Sign up for a new account in our community. It's easy!

Register a new account

Sign in

Already have an account? Sign in here.

Sign In Now


×
×
  • Create New...