Jump to content

Open "fpn" 3D Printed Pen Design


ZoidbergFr

Recommended Posts

  • Replies 43
  • Created
  • Last Reply

Top Posters In This Topic

  • ZoidbergFr

    9

  • Driften

    8

  • billy1380

    5

  • k3usr

    4

Top Posters In This Topic

Posted Images

The white one is impressive! Congrats!


I wonder if a Kaweco clip would fit that cap?

Edited by sciumbasci
Link to comment
Share on other sites

nice work man. i've designed something similar for a client (sorry, can't show... one would think a pen wouldnt be top secret :D), but im liking your work!

Link to comment
Share on other sites

Nicely done. Congratulations on the international cooperation!


Are you thinking on giving a smoother look to it? And if so, how would you do it? By sanding?

WomenWagePeace


SUPORTER OF http://imagizer.imageshack.us/v2/100x75q90/631/uh2SgO.jpg


My avatar is a painting by the imense surrealist painter Remedios Varo

Link to comment
Share on other sites

Nicely done. Congratulations on the international cooperation!


Are you thinking on giving a smoother look to it? And if so, how would you do it? By sanding?


I'm not the OP, but if ABS is used to print the pen, one could try using acetone vapor to smooth the rough edges. (See: Smoothing Out Your 3D Prints With Acetone Vapor) Though on second thought, this method might not work as well in something like a pen, which requires parts to fit within a certain tolerance.

the economical penster - celebrating inexpensive pens!
Link to comment
Share on other sites

  • 1 month later...

Where is a good place to get the JOWO #6 nib unit? Am I correct in thinking you need the screw in type unit not just a friction fit (nib and feed)?


Thanks for sharing!

Link to comment
Share on other sites

Where is a good place to get the JOWO #6 nib unit? Am I correct in thinking you need the screw in type unit not just a friction fit (nib and feed)?


Thanks for sharing!

Fpnibs.com is your friend
Link to comment
Share on other sites

This is very cool... well done... I was playing with something similar myself. Just started designing the piston assembly.


fpn_1483975804__selection_095.png


The issue is a 3d printed part will not be smooth inside. I am not sure normal o-rings are going to seal against the inside of the body well. Also I am not sure ink will not get absorbed by the plastic. I have used felt tip pens to try and mark dice I have printed and the ink feathers and expands into the plastic. I expect for a piston filling pen you will need to smooth the area and put a sealant over the plastic. Both of which will affect your tolerances.

Link to comment
Share on other sites

Nicely done. Congratulations on the international cooperation!


Are you thinking on giving a smoother look to it? And if so, how would you do it? By sanding?


You can always and and polish the outside of the pen. In that way it's not much different then a machined pen. Most people want to go the easy route and use chemicals to do it like acetone on ABS, but you don't have to go that way. People that make 3D printed props sand them and then use fillers and paint to make it into a finished prop. Nothing says that can't be done here.

Link to comment
Share on other sites

On the issue of strength, do to the load on a pen body in use printing it standing up gives the weakest pen. It is the easiest to print, but the stress would all be against the layer bonding. If it was printed on its side it would be much stronger, but cleaning out support from inside the body would be a pain! For people with a dual extruder setup were the support material could be dissolved afterwords would be the best. My Taz4 only has one extruder right now so that is not an option for me.


Another thing to remember is after you have things prototyped the way you like it, you can always have it printed by a service that can use metals or porcelain.

Link to comment
Share on other sites

Its my understanding that the nibs at Meister Nibs http://meisternibs.com are Jowo units. So buyers in the US have that as an option. fpnibs.com is not cheep to ship to the US.


Thanks, I ordered one from meisternibs, you are right about the shipping!

Link to comment
Share on other sites

Hi Christophe,

Can you upload the bezier shape section (the white one in the picture) to thingiverse?


Thanks again for sharing this project!


John

Link to comment
Share on other sites

  • 2 weeks later...

Okay, I printed the model in pla on my taz printer. I had issues with the section where my nib unit would not screw into the section but my section fit the body of the pen so would still end up with a working pen. One tip use a raft when printing.


A few suggestions use a multi start thread for the cap/body connection. It takes three full turns to remove the cap. There are OpenScad libs that allow you to set the number of starts on the thread. Then it would be like commercial pen caps. For example this lib http://dkprojects.net/openscad-threads/


I was amazed at how well the threads printed.


The other suggestion is to change the same of the tail of the pen. The step down is too lose to hold the cap posted. I don't normally post but if you are going to make the pen look like it can you should have it fit nicer, otherwise why have the shape that way? A more gradual radius to the end would look better. Just a suggestion.


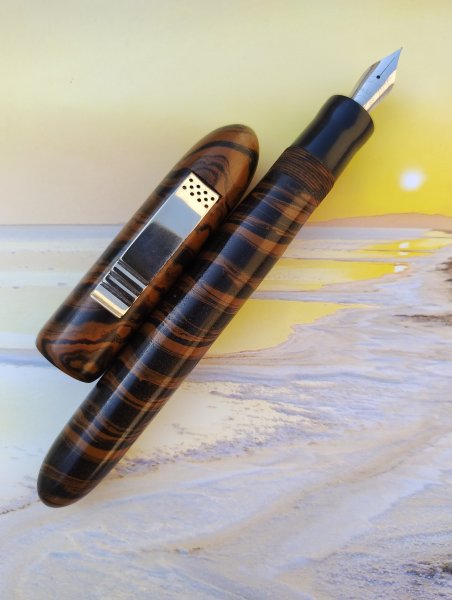
I did not do any finishing work to the pen so it could look nicer but thought I would share a picture anyways to show I did make one and how it would look with a different section. I did not finish removing the raft on the end of the body, and the cap print was not the best, but for proof of concept it was not worth reprinting. The issue was I had the temp too high for that pla and lowered the temp mid print. I thought I had changed it in the slicer but somehow it changed back :huh: Same with the section.


http://driften.dragonsightsoftware.com/images/3DPen.jpg

Link to comment
Share on other sites

  • 3 weeks later...
  • 2 weeks later...

Thanks for sharing the design. Merci à vous! I'll be printing this once I've calibrated my printer.


I too would be interested in the OpenSCAD files — I'm curious as to how the threads were generated as I've not seen any handy guides for printing decent threads for fine things much.

Perhaps sharing this on github or bitbucket would be a way to go, licencing under a good licence?


(Plus, it's not reaaally open source without… an open source ;) :D )

Link to comment
Share on other sites

Thanks for sharing the design. Merci à vous! I'll be printing this once I've calibrated my printer.


I too would be interested in the OpenSCAD files — I'm curious as to how the threads were generated as I've not seen any handy guides for printing decent threads for fine things much.

Perhaps sharing this on github or bitbucket would be a way to go, licencing under a good licence?


(Plus, it's not reaaally open source without… an open source ;) :D )


I know I would be interested in seeing the code, but there are several OpenScad thread libs including the one linked to in my post above...

Link to comment
Share on other sites

  • 2 weeks later...

Hello ,

I have not been here for a while (changed job,etc......and printed cosplay accessories for friends..)


I will upload the openscad files.

I used "poor man thread library" for this , took me few test and trial to have them dialed in.


I agree for the open source....! this is why i will release the files.


Christophe

Link to comment
Share on other sites

Okay, I printed the model in pla on my taz printer. I had issues with the section where my nib unit would not screw into the section but my section fit the body of the pen so would still end up with a working pen. One tip use a raft when printing.


A few suggestions use a multi start thread for the cap/body connection. It takes three full turns to remove the cap. There are OpenScad libs that allow you to set the number of starts on the thread. Then it would be like commercial pen caps. For example this lib http://dkprojects.net/openscad-threads/


I was amazed at how well the threads printed.


The other suggestion is to change the same of the tail of the pen. The step down is too lose to hold the cap posted. I don't normally post but if you are going to make the pen look like it can you should have it fit nicer, otherwise why have the shape that way? A more gradual radius to the end would look better. Just a suggestion.


I did not do any finishing work to the pen so it could look nicer but thought I would share a picture anyways to show I did make one and how it would look with a different section. I did not finish removing the raft on the end of the body, and the cap print was not the best, but for proof of concept it was not worth reprinting. The issue was I had the temp too high for that pla and lowered the temp mid print. I thought I had changed it in the slicer but somehow it changed back :huh: Same with the section.


http://driften.dragonsightsoftware.com/images/3DPen.jpg


I like that design!!! Very nice.

Sorry, but the colour... not my thing ;)


Thank you very much for sharing with us.

The beginning of a new era!

WomenWagePeace


SUPORTER OF http://imagizer.imageshack.us/v2/100x75q90/631/uh2SgO.jpg


My avatar is a painting by the imense surrealist painter Remedios Varo

Link to comment
Share on other sites

Create an account or sign in to comment

You need to be a member in order to leave a comment

Create an account

Sign up for a new account in our community. It's easy!

Register a new account

Sign in

Already have an account? Sign in here.

Sign In Now


×
×
  • Create New...