Jump to content

Making A Pen Case


my63

Recommended Posts

Thanks Vera I really do like a challenge I have had a few other jobs to do today like meeting Stan the labradors new owners.
The next step is to trim the edges
IMG_1229_1 by my0771, on Flickr


IMG_1227_1 by my0771, on Flickr


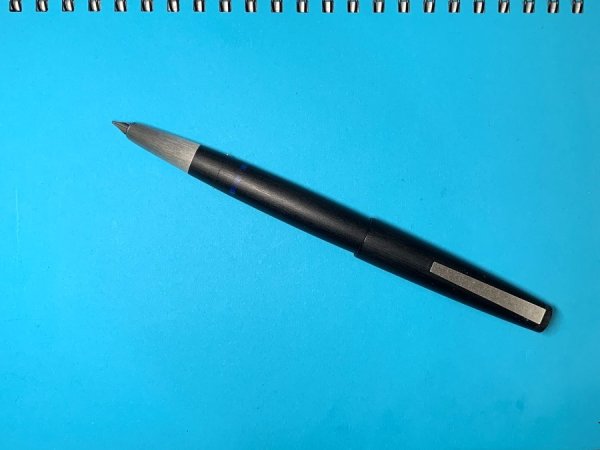
As you can see the model pen fits with space to spare although it will be cosseted in the finest suede.

On the subject of suede Vera do you have a colour in mind for the interior I have black grey turquoise navy blue.

Thread I have black white and gold there are more colours available.


Michael

For more details on my current projects please visit my blog.


https://my63leather.wixsite.com/my63


Link to comment
Share on other sites

  • Replies 1.9k
  • Created
  • Last Reply

Top Posters In This Topic

  • my63

    1122

  • Anne-Sophie

    271

  • kiavonne

    34

  • Tinjapan

    30

Top Posters In This Topic

Posted Images

Hi Michael,

I am tending to blue for the suede inner lining although if you had a matching red for the oxblood coloured leather that would be nice too. It already looks very interesting. You are a very exciting craftsmen.

Vera

Link to comment
Share on other sites

This is the blue and oxblood please remember the camera lightens the colours.
IMG_1245 by my0771, on Flickr


The outer leather is in the press now I will see how it looks when it is dry tomorrow
This is still just a prototype and might not be fit for use when it is dry I also have some thicker leather that I might try but I am not sure that it will take the shape.
Michael
Edited by my63

For more details on my current projects please visit my blog.


https://my63leather.wixsite.com/my63


Link to comment
Share on other sites

The leather is out of the form and looks ok
IMG_1254_1 by my0771, on Flickr


IMG_1255_1 by my0771, on Flickr


IMG_1257 by my0771, on Flickr


There are a couple of marks from the edges of the form I will cut this piece off and start the process again with the rough edges smoothed out.

I should have explained that the first piece out of the form will show up any faults which it has done I will find each one and smooth it out before starting the next piece


Thanks for looking


Michael

For more details on my current projects please visit my blog.


https://my63leather.wixsite.com/my63


Link to comment
Share on other sites

Whilst i am waiting for the Omas 360 outer to dry I have started forming the Kydex for another project. The pens in question are 20 mm x 147 mm
IMG_1260_1 by my0771, on Flickr


These are fresh out of the form and need to be trimmed.


There wont be as many pictures as my small camera has broken.


Leather is next.

Thanks


Michael

For more details on my current projects please visit my blog.


https://my63leather.wixsite.com/my63


Link to comment
Share on other sites

I am suffering from some technical issues at the moment my small camera stopped accepting memory cards the other day so i brought out the digital slr now my computer will not read the cards from that camera. Oh well before the slr stopped working I took some pictures last night.


IMG_1281 by my0771, on Flickr


Here i have drilled holes in the kydex to allow four rare earth magnets to be glued in place i will do the same with the lid. At this point it does not look like the magnets will be strong enough to hold the lid in place. I have been looking at other options


(url="http://www.leprevo.co.uk/photos/sam-browne-skinny.htm"]http://www.leprevo.co.uk/photos/sam-browne-skinny.htm[/url]


These look very good my first thought was to put one on the top but now I am thinking possibily one on either side. As I had ran out of leather I picked some up at the same time.

Thanks for looking

Michael

Edited by my63

For more details on my current projects please visit my blog.


https://my63leather.wixsite.com/my63


Link to comment
Share on other sites

If your PC stops reading memory cards before you do any thing else turn it off and back on again :wallbash: :headsmack: :doh:

my main worry with these sam browne studs was how far they would stick out.


IMG_1292_1 by my0771, on Flickr


The picture above shows suede inner lining then kydex with the bolt sticking through then the stud fixed to the other side of the kydex then the leather then the suede and leather of the lid I think it looks good.


Thanks for looking


Michael

For more details on my current projects please visit my blog.


https://my63leather.wixsite.com/my63


Link to comment
Share on other sites

Beautiful work Michael. I stumbled across this thread just today and enjoyed your progress and beautiful workmanship. Maybe if I am good, I can manage to get one from you at some point.


Lovely work.

http://www.ishafoundation.org/images/stories/inner/ie-logo.gif


Inner Engineering Link

Link to comment
Share on other sites

Likewise just stumbled across this thread. Beautiful work and the conversational presentation makes for a delightful read.

Link to comment
Share on other sites

Thanks Pelman and PaFitch I enjoy both the making of items and passing the information on to others.

I am really pleased that you enjoyed reading my ramblings, thanks for taking the time to comment.

I do sometimes have cases available but I always find it hard to put a price on things I have made or restored.

I enjoy the challenge of these projects and as the wooden boxes was getting a little heavy for me moving to leather work has been great.

Someone suggested looking at carving earlier especially Japanese sheaths and I am hoping to get some information soon.

Thanks again

Michael.

For more details on my current projects please visit my blog.


https://my63leather.wixsite.com/my63


Link to comment
Share on other sites

I am sharing as I go here so please have that in mind you might need a little imagination as well
IMG_1299_1 by my0771, on Flickr


I had planned on forming another piece of kydex to make the lid of this case when I thought about it the top does not need to be solid as the whole pen will be inside the body of the case.

I used the end of the case as a form to make the lid then forced the wet leather to take the shape.

The piece to the right in the picture is quite long as it also forms the back of the case I have doubled leather here to give extra strength.

the lower part of the lid will be shaped to lead to the stud fastener.


IMG_1300_1 by my0771, on Flickr


The picture makes the case look short but the outside size is 170 mm I have folded the back piece into place.


The two cases below are a pair for Tinjapan to go with the trays I am making for one of his writing slopes I will be posting pictures of them in another thread.


IMG_1310_1 by my0771, on Flickr


Here are all three together the angle of the picture makes a huge difference


IMG_1322 by my0771, on Flickr


I am thinking what the smaller cases would look like with the sam browne stud


Thanks for looking


Michael

For more details on my current projects please visit my blog.


https://my63leather.wixsite.com/my63


Link to comment
Share on other sites

This is the first of the pair for Tinjapan to be assembled following feedback from the other cases I have made the flap longer
IMG_1329_1 by my0771, on Flickr


When I saw this picture I was a little worried as the opening looks very small I checked the size and it was 22 mm at the smallest point as the pen is 20 mm everything is fine.


IMG_1330_1 by my0771, on Flickr


Whenever you do anything to shape veg tan leather it is best to wet it first which is why there are dark marks on the surface of the leather.


This is the Omas 360 case for Vera she might not like it when she sees this part but I can always make another if it is not right.

In this case I wet the leather to allow it to stretch over the head of the stud then it will shrink slightly and tighten around the post.


IMG_1335_1 by my0771, on Flickr


I have glued the two pieces together to form the lid the inside of the lid will be the soft suede side of the hide which I will dye the same colour as the rest of the case.


Thanks for looking


Michael

For more details on my current projects please visit my blog.


https://my63leather.wixsite.com/my63


Link to comment
Share on other sites

Hello Michael,

Ah an interesting development. I wondered how the lid will stay in place. So will the leather just slip over the stud and that keeps the lid closed? :) Vera

Link to comment
Share on other sites

Yes Vera that is just about it, I was a little unsure until I checked with the guys at Le Prevo they showed me how to fit them if fitted correctly they are perfect for this application.

The leather has a hole punched into it the same diameter of the shaft then a slot is cut away from the point of tension to allow the ball to pass through.

IMG_1349_1 by my0771, on Flickr


I have doubled up a piece of the same leather to give you an idea of how it will look the ball on the top is 5 mm in diameter.

these studs were used by holster, sheath and harness makers to secure leather straps for many years.


IMG_1350_1 by my0771, on Flickr


I will look for an alternative if you dont like it but I plan on making a number of cases with these fasteners as I think they are an elegant solution.


Thanks


Michael


For more details on my current projects please visit my blog.


https://my63leather.wixsite.com/my63


Link to comment
Share on other sites

I like the stud. I had a custom bag from Renaissance Art made with a stud and strap closure, it works very well. Unfortunately, I worked the stud free (it screwed together) and I lost it, and I need to get a replacement. I don't think that would affect a pen in this instance, as it won't get near the pressure and use that I've put my bag through. Is that stud one piece or two? Is it sandwiched between the leather and suede on the inside?

Scribere est agere.

To write is to act.

___________________________

Danitrio Fellowship

Link to comment
Share on other sites

This is my plan for the shape of the lid as you can see I have used strips of masking tape on which I have marked my curve using the edge of the roll of tape as a guide using the inside and the the outside to make the curves.
I have removed the tape and stuck it to a piece of card I will cut it out and use the face and reverse to cut each side of the lid.
IMG_1355_1 by my0771, on Flickr


I hope it makes sense to everyone but especially to Vera.

I really like these Sam Browne studs and I think I will use them on future cases they are a simple and elegant solution a similar technology to the fountain pen it is intended to protect.


In fact once Christmas and the dreaded big birthday are out of the way I will be making another batch.

Thanks for looking

Michael

For more details on my current projects please visit my blog.


https://my63leather.wixsite.com/my63


Link to comment
Share on other sites

These are so beautiful. They really are. I might have to send you a pen to experiment with, too, one day.

Scribere est agere.

To write is to act.

___________________________

Danitrio Fellowship

Link to comment
Share on other sites

I like the stud. I had a custom bag from Renaissance Art made with a stud and strap closure, it works very well. Unfortunately, I worked the stud free (it screwed together) and I lost it, and I need to get a replacement. I don't think that would affect a pen in this instance, as it won't get near the pressure and use that I've put my bag through. Is that stud one piece or two? Is it sandwiched between the leather and suede on the inside?

Hi Kiavonne

It is very funny I was on the phone to my brother when you posted asking him about thread lock to ensure it cannot come loose.

If you have problems finding a stud let me know the size you are looking for (remember the hole is the size of the shaft not the ball) my supplier has a wide range and i will be sending at least one case to the USA after Christmas I could send that as well.

My studs are two piece it is fixed to the kydex and the suede will cover the inside and the leather is covering the outside.

Michael

For more details on my current projects please visit my blog.


https://my63leather.wixsite.com/my63


Link to comment
Share on other sites

There is a point in all of these projects where I have to take a deep breath and do something.
On this project it was to cut the lid to the shape I thought would like I wanted it to, Well I have the look that I was after although I am still a little nervous I am not certain that the lid will open wide enough when sewn together to allow the pen to be put into or removed when in use.
IMG_1363_1 by my0771, on Flickr


IMG_1359_1 by my0771, on Flickr


Although I have limited experience working with leather I have asked the experts at Le Prevo my leather suppliers who have been kind enough to check my design and provide expert advice.

As Vera would like the thread the same colour as the case I will sew this together before dying the leather so the thread will also take the dye.


IMG_1367_1 by my0771, on Flickr


I have glued the two pieces together and then soaked the lid ready to punch the hole I was going to wait until I had sewn the case together but I realised that was not possible.

I will wet the whole case down now in order to even up the colour it will also show up the areas which still have wax on from the forming stage.


Thanks for looking


Michael

For more details on my current projects please visit my blog.


https://my63leather.wixsite.com/my63


Link to comment
Share on other sites

Create an account or sign in to comment

You need to be a member in order to leave a comment

Create an account

Sign up for a new account in our community. It's easy!

Register a new account

Sign in

Already have an account? Sign in here.

Sign In Now


×
×
  • Create New...