Jump to content

Sheaffer Vac-Fil Issues


Apete06

Recommended Posts

Hi everyone!

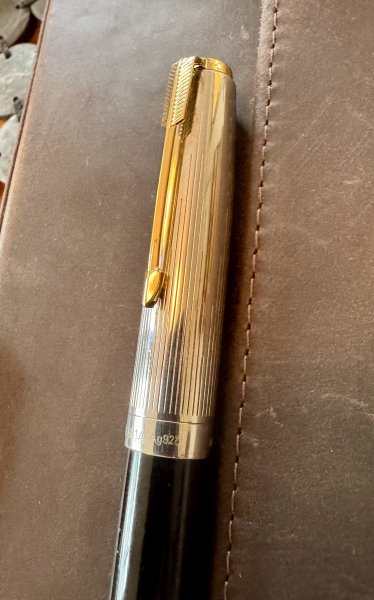
I have a Sheaffer triumph Tuckaway vac-fil I got for cheap on eBay, and I'm having some issue with it. It wasn't filling right, so I sent it off for repair, but when it came back, the pen still wasn't taking ink. While trying to determine the issue, I noticed the pen did not create a vacuum on the downstroke and instead, filled like a syringe on the upstroke. While test filling with water, I noticed bubbles emanating from the screw post for the blind cap. I found the leak, reported it to the folks who repaired my pen, sent for them to address, had it returned, and I still have the bubbles and no vacuum. I'm really frustrated, as I can SEE the air leak! Is there anything I can do to seal this leak? I've never done any repairs to a vintage before, so if its something I can done relatively easily, I'm all for trying. If not, I'm emailing Main Street Pens. Anybody have some suggestions?


Thanks!


Oh, and here is a pic of where the bubbles come out.

post-84630-0-14013400-1371309231_thumb.jpg

Of course I have pen and paper ready!

Link to comment
Share on other sites

  • Replies 12
  • Created
  • Last Reply

Top Posters In This Topic

  • Ron Z

    2

  • Apete06

    2

  • FarmBoy

    1

  • Indy_Pen_Dance

    1

Top Posters In This Topic

Posted Images

I do see this from time to time, and it often doesn't appear until AFTER the pen has been put back into use for a while. On the early plunger fillers, the war time short section pens in particular, the packing unit comes loose. Not loose enough to come out easily, but loose enough that it leaks between the barrel and the packing unit. It can also happen if the packing unit was removed and then shellaced into the barrel.


Now you do know that a Tucky doesn't hold a heck of a lot of ink, maybe half full at best. That's because the stroke is so short it doesn't develop a lot of vacuum, so can't pull a lot in. But still, one should test it and watch as it's filled with water - I put a light behind the barrel as I test it. Then I immerse the nib in the water and cycle the plunger multiple times. If it doesn't pull in water, or if anything comes out the back end, it isn't repaired. I'm surprised though that it wasn't corrected when the pen was restored, and then returned after warranty repair. The first time around sure - we all make mistakes and miss things. That's why we have a warranty.


Thre are two or three different approaches to repairing the pen. It may involve removing the packing unit, and may involve removing the nib, or both. It may be relatively easy to do, worst case would involve replacing the packing unit. Anything beyond that without seeing the pen would be a guess.

spacer.png
Visit Main Street Pens
A full service pen shop providing professional, thoughtful vintage pen repair...

Please use email, not a PM for repair and pen purchase inquiries.

Link to comment
Share on other sites

I knew you'd have info Ron! Having had A few Tucky's, I'm pretty familiar with how much they fill. When I hold this one up to the light and try to fill with Sheaffer Black ink, an ink you can easily see in the pen, I get nothing. I can even feel (or should I say, not feel) the lack of vacuum. And then there are the bubbles. Sounds like I'll be seeking your services for this repair job. I'll stick with the professionals instead of trying this one on my own!


Thanks!

Of course I have pen and paper ready!

Link to comment
Share on other sites

Would it be possible to fix this by putting a very small amount of (diluted?) shellac around the top of the packing unit? Or, otherwise, taking the pen apart, remove the packing unit and glue it back with shellac?


Thre are two or three different approaches to repairing the pen. It may involve removing the packing unit, and may involve removing the nib, or both. It may be relatively easy to do, worst case would involve replacing the packing unit. Anything beyond that without seeing the pen would be a guess.

The problem with ideas is that good ideas and bad ideas look about the same until you put them into practice.

Link to comment
Share on other sites

Would it be possible to fix this by putting a very small amount of (diluted?) shellac around the top of the packing unit? Or, otherwise, taking the pen apart, remove the packing unit and glue it back with shellac?


The joint between these two pieces are a chemically sealed joint. Shellac, if it was to seal the leak would fail in a short time. This could also cause problems with the blind cap screwing in correctly. As always it is best to do thing correctly rather than try and rig a temporary fix that will cause your more problems and most likely more money down the road.

Link to comment
Share on other sites

Do we know for sure these end packing units were solvent welded in place? I've seen enough that appeared to be friction fit. I suppose the worst solvent welds ever are a possibility.

San Francisco International Pen Show - The next “Funnest Pen Show” is on schedule for August 23-24-25, 2024.  Watch the show website for registration details. 
 

My PM box is usually full. Just email me: my last name at the google mail address.

Link to comment
Share on other sites

The early ones may not have been, but I'm comfortable saying that the later ones were solvent welded. Sheaffer's instructions were to drill out the worn out packing unit and replace it. They didn't intend for them to be repaired. Once in a blue moon you encounter a packing unit that is loose, but others simply do not budge. At all. Ever.


re. using shellac. Even diluted it doesn't wick into where it needs to go. If you haven't removed the rod and head gasket, you could very well shellac them to the barrel wall, so you need to remove the nib. May as well do it right.

spacer.png
Visit Main Street Pens
A full service pen shop providing professional, thoughtful vintage pen repair...

Please use email, not a PM for repair and pen purchase inquiries.

Link to comment
Share on other sites

I don't think you can go wrong sending it to Ron for repair.

Link to comment
Share on other sites

This is a great thread; thank you to everyone who has participated.


I have a chance to buy a Tuckaway pen/pencil set, but I'm holding off simply because the repair worries me. I still don't fully understand how the repair should proceed, and I haven't found any videos that would help explain the work.


In any case, a very informative thread. Thank you for jumping in, Ron :thumbup:

There are a thousand thoughts lying within a man that he does not know till he takes up a pen to write.

--William Makepeace Thackeray


Visit my blog to see the pens I have for sale


Paul's Pens

Link to comment
Share on other sites

I don't think you can go wrong sending it to Ron for repair.

+1 on that. Ron did a beautiful job for me repariing a nice, fat vac-filler that another restorer had tried and failed to fix. Ron did a truly remarkable job. I cannot recommend him highly enough.

Link to comment
Share on other sites

The early ones may not have been, but I'm comfortable saying that the later ones were solvent welded. Sheaffer's instructions were to drill out the worn out packing unit and replace it. They didn't intend for them to be repaired. Once in a blue moon you encounter a packing unit that is loose, but others simply do not budge. At all. Ever.


re. using shellac. Even diluted it doesn't wick into where it needs to go. If you haven't removed the rod and head gasket, you could very well shellac them to the barrel wall, so you need to remove the nib. May as well do it right.

So - if one does encounter a loose packing unit, what is the best way to re-secure it? If it's loose enough to slide out of the barrel will there be enough contact with the barrel for a solvent weld?

Link to comment
Share on other sites

send your pen to ron zorn, so you will have a fully functional and good condition working vac fill

Pens are like watches , once you start a collection, you can hardly go back. And pens like all fine luxury items do improve with time


Link to comment
Share on other sites

I still don't fully understand how the repair should proceed, and I haven't found any videos that would help explain the work.


Hi Paul,

Nathan Tardif, Noodler's founder, made a video that describes the process:
The Vac-Fil restoration starts at around the 13:00 minute mark.
Note that Nathan uses old-fashioned repair techniques. He's the kind of guy who, when he wants to start a fire, he rubs two sticks together. Nathan is amazing to watch, but don't try his method at home (do it at Ron Zorn's house).


Carpe Stilo

Link to comment
Share on other sites

Create an account or sign in to comment

You need to be a member in order to leave a comment

Create an account

Sign up for a new account in our community. It's easy!

Register a new account

Sign in

Already have an account? Sign in here.

Sign In Now


×
×
  • Create New...