Jump to content

Little Boxes


my63

Recommended Posts

It's really been enjoyable to watch the evolution of your box projects! Thank you for all your efforts in posting these photos and for describing each step of development. By the way, there are plenty of pens out there that will fit a 5 inch slot!!!!!!!!!!!!! Really very nice work!

Link to comment
Share on other sites

  • Replies 295
  • Created
  • Last Reply

Top Posters In This Topic

  • my63

    159

  • fuchsiaprincess

    36

  • Scrawler

    21

  • mhguda

    15

Top Posters In This Topic

Posted Images

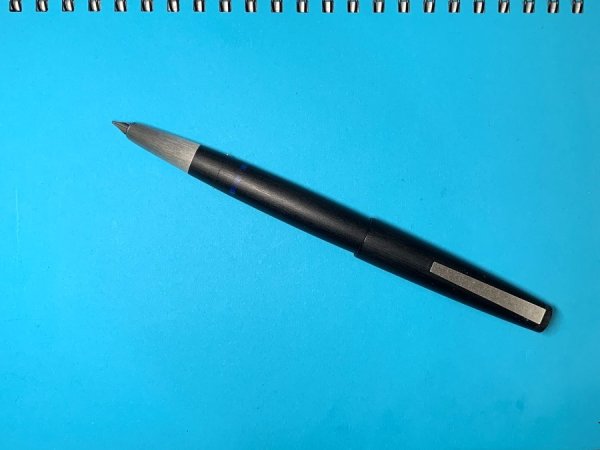
It is just not my day today


http://farm9.staticflickr.com/8182/7930981854_ab8c0f49b3_z.jpg

IMG_1909 by my0771, on Flickr


Can you spot the mistake


:bonk: :crybaby: :crybaby:


Tomorrow is another day


hope it helps someone smile


This is a great thread, I make boxes for fun too, mostly out of burls and it is definitely a trial and error approach.


It's not a mistake of the box, you just grabbed the wrong pen, silly! Since you're using veneer, why miter when you can just use a butt joint?


Some of your hinge dilemma can be solved by going old style with dowel pegs for swinging tops. With the right angles, the top would actually "lock" itself shut. Check out Roy Underhill's stuff, he uses all hand tools but it can certainly be done with "real" tools. ;)

Edited by AfterMyNap

—Cindy


“This is the sort of pedantry up with which I will not put.”

—Winston Churchill (attributed)

Link to comment
Share on other sites

It is just not my day today


http://farm9.staticflickr.com/8182/7930981854_ab8c0f49b3_z.jpg

IMG_1909 by my0771, on Flickr


Can you spot the mistake


:bonk: :crybaby: :crybaby:


Tomorrow is another day


hope it helps someone smile

This reminds me of an incident when I was 11 years old, my carpentry master shouted while belabouring me with a yard stick "MEASURE TWICE - CUT ONCE".

I had the same lesson when I served my apprenticeship

The really funny thing is that I did measure twice I cut two pieces of walnut the same length realised they were wrong and then cut two more the same lenght and made the box the wrong size.

Michael

For more details on my current projects please visit my blog.


https://my63leather.wixsite.com/my63


Link to comment
Share on other sites

Thanks Dannyboy

Aftermynap I would like to see some of your work.

The box is solid oak and walnut I used the walnut veneer to hide the magnets I fitted into the oak.

I had some small brass hinges that work nicely.


http://farm9.staticflickr.com/8318/7950817396_e5dbe23384_z.jpg

IMG_1945 by my0771, on Flickr


Almost finished this picture with flash shows the real colours after french polishing


http://farm9.staticflickr.com/8455/7950809414_45a0f15ec0_z.jpg

IMG_1939 by my0771, on Flickr


Interior is made from brown leather and small pieces of dowel wood edging needs a little finish

http://farm9.staticflickr.com/8171/7950814652_195fe459b9_z.jpg

IMG_1943 by my0771, on Flickr


Thanks for looking

Michael

For more details on my current projects please visit my blog.


https://my63leather.wixsite.com/my63


Link to comment
Share on other sites

Here it is and I have found a pen to fit :roflmho:


http://farm9.staticflickr.com/8034/7958032850_e4f9c1b5ed_z.jpg

IMG_1953 by my0771, on Flickr


Now this box is finished I still need to make one for the Victory.

Might measure a little more carefully next time


Michael

For more details on my current projects please visit my blog.


https://my63leather.wixsite.com/my63


Link to comment
Share on other sites

This little box is nearing completion the two pen channels are almost complete not quite straight yet but almost :roflmho:


http://farm9.staticflickr.com/8321/7977037777_9575e2d369_z.jpg

IMG_1999 by my0771, on Flickr


I have a couple of options for the inside I have some veneer however I am not sure if I could get the veneer to stick in the curved areas.

Then there is leather I have some nice chocolate coloured leather (clothing type) which should be safe for pens this could also be reversed for suede.

Or a combination of both suede in the channels and veneer around the top.

Outside will be oak with french polish.

I would really appreciate any advice particulary regarding the veneer.

Thanks

Michael

For more details on my current projects please visit my blog.


https://my63leather.wixsite.com/my63


Link to comment
Share on other sites

I like the magnetic catches you are using. I cannot imagine how you will veneer the inside curvature of the pen holder slots, and do not think it necessary. With that piece of oak, do you really think it necessary to veneer it anyway? Have you got horrible machine marks you want to cover? Last time I veneered anything was because I made it from basswood and covered it in mahogany, then 20 layers of varnish to get that wood under glass look. But with a box like this, I would have thought nothing but a good smoothing and french polish were all you would need.

Link to comment
Share on other sites

The catches are just magnets sunk into the wood I thought it looked better when they were covered by veneer.

I am not trying to hide machine marks I have used a chisel and a proxxon multi tool for sanding if I were to make any more of this type then I will get the router out of the shed.

I like oak and the outside was always going to be oak with French polish. I thought the inside should be a little different.

Softer so the pens would not rattle about. Quite as much as with the bare wood.

I have not decided what to do with this one yet I gave the last one to a friend and he loved it.

I have a similar box that I started then misplaced for a few days so I started this project.

Thanks for replying

Michael

For more details on my current projects please visit my blog.


https://my63leather.wixsite.com/my63


Link to comment
Share on other sites

The catches are just magnets sunk into the wood I thought it looked better when they were covered by veneer.


Yes of course, how silly of me.


I am not trying to hide machine marks I have used a chisel and a proxxon multi tool for sanding if I were to make any more of this type then I will get the router out of the shed.

I like oak and the outside was always going to be oak with French polish. I thought the inside should be a little different.

Softer so the pens would not rattle about. Quite as much as with the bare wood.

I have not decided what to do with this one yet I gave the last one to a friend and he loved it.

I have a similar box that I started then misplaced for a few days so I started this project.

Thanks for replying

Michael


I do like you little boxes very much. I wish I had facilities to do it myself. I have not done any woodwork in 25 yeas due to having neither workshop nor tools anymore. :crybaby: I do agree that it is nice to have a soft bed for them, so they do not rattle around. :thumbup: I particularly like the multi-wood one above with the liner. :clap1: If I were 5000 miles closer I would run over to your house and force you to sell it to me. :P

Link to comment
Share on other sites

Thank you scrawler I too prefer the multi wood boxes the solid ones take a long time as i can only do a little work.


The only tools used were a saw,saw box,pencil clamps, I dont have a workshop I have a work table out on my deck and my desk.

I will play with leather etc on one and will leave the other as oak with french polish just in case you knock on my door one day. :roflmho:


The solid oak boxes do require more tools a chisel and the proxxon multi tool thing that I use for sanding.

Thanks for your input.

Michael

For more details on my current projects please visit my blog.


https://my63leather.wixsite.com/my63


Link to comment
Share on other sites

  • 2 weeks later...

Whilst waiting for some veneer to dry I used some pieces of walnut I had lying around to make this


http://farm9.staticflickr.com/8172/8016186277_337fa96966_z.jpg

IMG_2058 by my0771, on Flickr


I cut the walnut to keep it simple I made the ends square (first mistake)

I then measured 1 thickness in from the back half way down I drilled a hole for a piece of dowel.

I cut the dowel drilled a corresponding hole in the walnut for the lid then stuck the four pieces together.


http://farm9.staticflickr.com/8448/8016187289_167c6ce681_z.jpg

IMG_2062 by my0771, on Flickr


I stuck the back on and when it came to the front I was a little concerned how I could remove the pen as the lid would not open with the back piece level I lowered the back only to realise that the opening would be very narrow (hence the mistake)

This was the point I decided to stick the front onto the lid and it is my plan to come up with some sort of leathe rest for a lovely pen.


http://farm9.staticflickr.com/8321/8016189351_ee4a0a3984_z.jpg

IMG_2065 by my0771, on Flickr


This is the unfinished box the question is should I leave it as it is or apply some veneer.


Thanks for looking

Michael

For more details on my current projects please visit my blog.


https://my63leather.wixsite.com/my63


Link to comment
Share on other sites

Whilst waiting for some veneer to dry I used some pieces of walnut I had lying around to make this


<snip>

This is the unfinished box the question is should I leave it as it is or apply some veneer.


Thanks for looking

Michael

Walnut is such a lovely warm wood that it would be a shame to cover it. However your construction technique of butt joints suggests that you had veneering in mind when you started. Let me suggest something you may wish to think of. Soften the hard lines of the butt joints by putting a small layer of glue on, then gently sand it. repeat this a few times until the lines become softened or even invisible, then varnish the whole box.

Link to comment
Share on other sites

As per Scrawler :thumbup:

http://i1027.photobucket.com/albums/y331/fuchsiaprincess/Fuchsiaprincess_0001.jpg http://fc02.deviantart.net/fs71/f/2010/036/2/2/Narnia_Flag_by_Narnia14.gif

Link to comment
Share on other sites

Oh no! I thought this thread was buried but here it is back to top of the forum. Now I have that song back in my head after several counselling sessions to expunge the tune. little boxes on a hillside little boxes............ AAaaaahhhhhhhhhh - make it go away!

http://img356.imageshack.us/img356/7260/postminipo0.png
Link to comment
Share on other sites

Oh no! I thought this thread was buried but here it is back to top of the forum. Now I have that song back in my head after several counselling sessions to expunge the tune. little boxes on a hillside little boxes............ AAaaaahhhhhhhhhh - make it go away!

But these are not made of ticky-tacky.

Link to comment
Share on other sites

Whilst waiting for some veneer to dry I used some pieces of walnut I had lying around to make this


<snip>

This is the unfinished box the question is should I leave it as it is or apply some veneer.


Thanks for looking

Michael

Walnut is such a lovely warm wood that it would be a shame to cover it. However your construction technique of butt joints suggests that you had veneering in mind when you started. Let me suggest something you may wish to think of. Soften the hard lines of the butt joints by putting a small layer of glue on, then gently sand it. repeat this a few times until the lines become softened or even invisible, then varnish the whole box.

Thanks scrawler I will try what you have suggested is that how you would prefer your box to be finished ;) ;)

Michael

Edited by my63

For more details on my current projects please visit my blog.


https://my63leather.wixsite.com/my63


Link to comment
Share on other sites

Scrawler to add to my last post this box was about the hinge for the lid and to try and work out how far forward to make the pivot.

I have a love for walnut and oak but sometimes I look at the walnut burl veneers and bird eye maple in my veneer box and think they would look really nice together.

Is your sanding glueing technique to fill the small gaps in the joints.

I have a dovetail jig but it is complicated for small projects.

Sorry about the song Pete must have been before my time :)

Thanks

Michael

Edited by my63

For more details on my current projects please visit my blog.


https://my63leather.wixsite.com/my63


Link to comment
Share on other sites

Oh no! I thought this thread was buried but here it is back to top of the forum. Now I have that song back in my head after several counselling sessions to expunge the tune. little boxes on a hillside little boxes............ AAaaaahhhhhhhhhh - make it go away!

But these are not made of ticky-tacky.

.............and they don't all look the same.

http://img356.imageshack.us/img356/7260/postminipo0.png
Link to comment
Share on other sites

Scrawler to add to my last post this box was about the hinge for the lid and to try and work out how far forward to make the pivot.

I have a love for walnut and oak but sometimes I look at the walnut burl veneers and bird eye maple in my veneer box and think they would look really nice together.

Is your sanding glueing technique to fill the small gaps in the joints.

I have a dovetail jig but it is complicated for small projects.

Sorry about the song Pete must have been before my time :)

Thanks

Michael

Yes. It is a technique I used when I used to make furniture. I understand that dovetailing is not good for small projects like this. I never had a jig. I used to have to saw and chisel, but that was very long ago. Mortice and tenon joints with contrasting wood can be nice, especially white and red wood. Another thing you might like to consider for future boxes are dowel joints, where the dowel wood is light in colour and the box is dark. The contrasting circles of colour can be very attractive.


I was entering my teenage years when Peter Seeger wrote that, and the protest movements were just starting up. I can hear it in my head now too. :blink:

Link to comment
Share on other sites

This is another version of the walnut and oak box (that is what is under the veneer) I have used a walnut burr veneer for the dark wood and a birds eye maple for the light.


http://farm9.staticflickr.com/8173/8026250842_d48117295d_z.jpg

IMG_2084 by my0771, on Flickr


http://farm9.staticflickr.com/8459/8026255595_4d03a57bf9_z.jpg

IMG_2098 by my0771, on Flickr


I need to cut the box in half now I hope I dont mess it up.


Red leather or brown leather ??


Thanks for looking

Michael

For more details on my current projects please visit my blog.


https://my63leather.wixsite.com/my63


Link to comment
Share on other sites

Create an account or sign in to comment

You need to be a member in order to leave a comment

Create an account

Sign up for a new account in our community. It's easy!

Register a new account

Sign in

Already have an account? Sign in here.

Sign In Now


×
×
  • Create New...