Search the Community
Showing results for tags 'landscapes'.
-
After somebody saw my Stairway to Heaven drawing, I was asked how to draw such a stairway and I though I would explain it step by step in this post. A stairway can be very effectively used as a main element leading viewers eyes towards focal points in a drawing and adds great visual appeal to a drawing. In this post, I will show how one can be drawn using very simple strokes. So, follow along and have fun. Step 1: Draw the Main OutlineMain aspect of stairway is that the stairs become smaller in size as they move away from viewer due to perspective. To account for that, draw tapered sides as shown below. Theory of perspective is quite involved and I won't go into its details here, but most importantly, make the taper believable (not too much, not too little). Also, a stair in natural setting, like here, is more forgiving from perspective point of view than a perfectly proportioned stair in an architectural setting. Step 2: Draw Stairs OutlineDepending on angle of view, the step (horizontal part) of a stair is either visible very less (when viewer is located below the stairs looking up) or if the viewer is in same/higher plain than stair, then the steps are visible more. Following shows how to draw stairs with less visible steps and when steps are more visible. In this post, we will use the first case, when steps are less visible. Stairs are drawn in this case as shown below for the outline drawn earlier. Decrease in size of stairs again follows perspective. Decrease the size (vertical distance) so that it feels plausible. Step 3: Darken the Side of StairsSide of stairs usually receive lot less light and so should be darkened as shown below. This also helps to bring the stairs out against a dark background. Step 4: Draw Horizontal StepsIn the case when horizontal steps ate not visible, we still need to give some indication for them. This is done by irregularly darkening the horizontal lines and making them bit thicker. This serves to indicate stair steps. Step 4: Texture Vertical RisersFinally, use a mix of parallel lines and tapered crevices to texture the vertical steps (risers) as shown below. Click on the drawing to see details. Make the edges zagged to give it bit broken, old feel. The amount of details also depends on the size of drawing. My Stairway to Heaven drawing is bigger in size and hence has more details on the stairs. Step 5: FinishA stairway needs to be usually complemented with other elements on its side. To give an indication of curved side, use curved parallel lines as shown below. Other elements can then be added as shown below to give it a finished feel. Very quick pleasing drawings incorporating stairs can be done as shown in following 2 examples below. A stone embankment provides a great side element with stairs leading the way between them as shown below. Drawing stone embankment is illustrated in vol. 3 of my pen and ink drawing workbooks. Following is a more involved drawing with stairway in a forest setting. Drawing forest and wooded area is discussed in detail in vol. 5 of my pen and ink drawing workbooks and also in these tutorials and this step by step drawing post. Once you learn to draw a wooded area, try incorporating a stairway in it to give it a different feel. This completes this post. Hope you found it useful and inspiring. Doing such simple drawing with pen and ink is very relaxing and rewarding. Give it a try. Check out my Free tutorials and pen and ink drawing workbooks to further learn drawing pen and ink landscapes. Pl. share this post in your social media and with others to get others to enjoy this incredible art. Happy Drawing, Rahul Older Step by Step Pen and Ink Drawings FREE Pen and Ink Drawing Tutorials Subscribe
- 1 reply
-
- art
- pen and ink drawing
-
(and 1 more)
Tagged with:
-

Step By Step: Drawing Snow Covered Pine Trees With Pen And Ink
rahul_jain posted a topic in The Write Stuff
Drawing snow covered pine trees is very easy and fun to do. With simple technique as illustrated below, anybody can attempt them and draw pleasing winter landscapes based on them with pen and ink. So grab a pen and paper and follow along. Step 1: Draw the OutlineDraw a typical Christmas tree shape in dotted line as shown below. Don't use a hard line for the outline. Step 2: Drawing the EdgesUse the following strokes to texture the edges. Correctly texturing edges as shown above is very important as it gives the feel of pine trees to the outline. Step 3: Texturing InsideTo give a feel of snow, add following marks inside the tree in irregular manner. Snow usually doesn't cover a tree completely and these marks indicate those areas. These help to bring out the feel of tree and snow. The white untextured area is perceived as snow. Relative density of white vs the marks will indicate the amount/level of snow on the tree. Use the type of shapes as shown above to texture the inside. Step 4: Texture Trunk and GroundTrunk can be easily textured using 2 tone technique. Also bottom of trunk near ground is left white in irregular shape to indicate presence of snow on trunk there. This is how easily a snow covered pine tree can be drawn. Step 5: Add Other TreesOther snow covered pine trees can be similarly drawn and added per your composition to create perception of depth and visual interest. Step 6: Finish with Ground and SkyTo create perception of snow on ground, use lines as shown below along with few blades of grass and twigs poking out of ground. A path on the snow can be added as well as shown below. Addition of sky creates a nice backdrop to the snow covered trees. This finishes this tutorial. Following is another example. Notice that I have used less tone on the trees below to give them more snow covered feel compared to drawing above. Following is a more detailed example but the technique used is the same. If you find yourself with some time, then grab a pen and paper and try doing some such pen and ink drawings. They provide great relaxation and will help you appreciate beauty of nature in a new way as you will be able to capture and express that beauty through your own interpretation. You can also visit my Free pen and ink drawing tutorials for more information. You can also subscribe to receive my weekly step by step pen and ink drawing posts Happy Drawing, Rahul -
I write weekly posts such as the following to inspire anybody to learn to do simple drawing with pen and ink. ------------------------------------------------------------------------------ Drawing a Waterfall: Drawing a waterfall may sound intimating, but as we will below, it is quite easy to do with few simple strokes that any beginner can do. I even did the following drawing with an ordinary writing gel pen. So, grab a pen and follow along. Such fun drawings gives us a creative break in our lives and are always enjoyable. Try one now. Step 1: Draw Top of Waterfall Start with a slight wavy line like below, indicating the top of waterfall, may be a river or a stream. Step 2: Draw Falling Water: Use slightly curved lines like shown below to indicate falling water. Turn the paper if need be to draw it. Don't make the lines flat. Give them a slight curve or bulge as shown below. Step 3: Add Volume to Water Use tapered dark like shown below to indicate volume in falling water. Step 4: Indicate Water Flowing Out After the fall, water continues its journey towards the viewer. Use lines like below to draw ripples that indicate that. Notice how they open up and grow bigger as they go out. Add such ripples to the waterfall. Step 5: Indicating Rocks and Mist Add some darks at the bottom of fall to indicate some stones/rocks and dots going up to indicate mist. Keep it irregular. The notion of suggestion is very important in pen and ink. With just some dark irregular shape, a feel of 'something there' can be conveyed. Step 6: Indicating Foliage on the Side To give a finished feel, something on the sides of the fall should be indicated. Wooded area works very well and is very easy to do as shown below. Use open loops to indicate foliage. make the base darker and add tapered darks to indicate trunks etc. Use the above technique to indicate wooded area as banks of waterfall. Step 7: Adding Reflection in Water Use more of water stroke to darken it to indicate reflection as shown below. Use the above technique to indicate reflection of wooded areas. Step 8: Add Sky Add Sky using horizontal parallel lines to finish this quick drawing. This finishes this tutorial. Hopefully it motivated you to pick up a pen and try drawing it and see how easy and enjoyable it is to do pleasing landscapes with pen and ink. Do let me know if you liked this post and any suggestions for future posts. Happy Drawing, Rahul
- 8 replies
-
- drawing
- landscapes
-
(and 4 more)
Tagged with:
-
Quick and Easy Pen & Ink Landscapes: "What can I draw from my imagination in the limited time I get from my busy schedule without any prior drawing experience" This is a question I often get asked and one that newcomers to art are often confronted with. In this post, I will describe a pleasing landscape that can be done quickly using simple steps. All you need is a good gel pen, a paper and a positive attitude. Drawing is not just for 'artists'. Every one of us can engage and enjoy this creative pursuit even with our limited time. Vol 6 of my workbook series covers this in detail. Here is a pleasing landscape that we will learn to draw step by step. The key elements of the drawing are highlighted below and in different steps, we will see how these elements can be easily drawn. Step 1: Draw Horizon First step is to draw the horizon in the shape of a flattened U using broken line as shown below. Step 2: Drawing Surface Contours: Horizon line drawn in step 1 indicates far out. In front of it lies the middle and foreground. The contour or surface shape of this area is next indicated by using curved parallel lines as shown below. These simple contour lines transforms a blank white space into pleasing indication of ground form. Step 3: Indicating Ground Cover (Grass): Grass is next drawn on these contour lines using small curved lines as shown below. Together with contour lines, this completes the drawing of ground. Step 4: Drawing Distant Tree Line: A distant tree line on horizon adds lot of visual interest and with its darker tone provides a nice contrast and a focal point for our eyes to rest. This is drawn next. Step 5: Drawing Background Element: Furthest out behind the distant tree line is the backdrop of a hill or a mountain. A backdrop like a hill below provides a very pleasing focal point for our eyes to rest as they travel from the foreground to background. A house, a church or any other such element can further be added at the top of the hill to add further interest. Step 6: Finishing with Sky: Sky is finally added to set the mood of the drawing. This contrast from lighter foreground surface to darker distant element and hills to again lighter sky makes the drawing appealing and draws viewers interest. This completes this overview of drawing quick and easy pleasing pen and ink landscapes. For more details on strokes and other considerations for drawing different elements covered above you can visit my completely free Tutorials page, or better yet, get the following pen and ink drawing workbook from Amazon. Available for only $6 from Amazon and other online retailers, this workbook covers the above steps in full details with step by step illustration of strokes and hands on activities. With coverage of lots of other options for drawing such landscapes, you will be able to draw the following in no time. For more information on the workbook, pl. click here Happy Drawing, Rahul www.pendrawings.me/getstarted
-
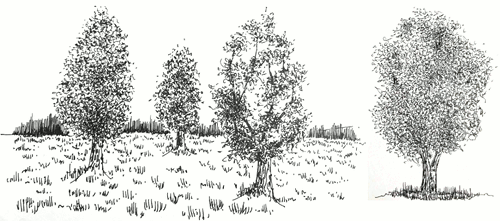
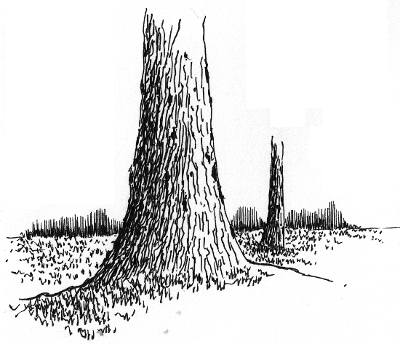
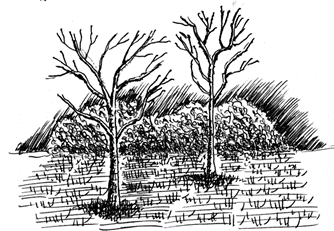
Hi, I am pleased to announce completely free workbooks for learning to draw simple landscapes in pen and ink. If you have ever wanted to learn how using simple pen strokes you can bring a landscape to life, then try them out. I have 2 initial volumes as following and would love to get any feedback on them in terms of their usability and content. You can get the workbooks at pendrawings.me/workbooks Pen and Ink Drawing Workbook vol 1: Draw Tree trunks and Wooden Posts This workbook with help you to be able to draw a landscape like the following in no time. Pen and Ink Drawing Workbook vol 1: Draw Trees and Bushes This workbook with help you to be able to draw a landscape like the following with fully illustrated concepts and guided exercises Get them now and happy drawing, Rahul www.pendrawings.me/getstarted
- 10 replies
-
- drawing
- landscapes
-
(and 2 more)
Tagged with:
-
As a pen and ink artist, my aim is to help people discover drawing simple landscapes with pen and ink as a creative and relaxing hobby. I have created completely free tutorials that help absolute beginners get started drawing with pen and experience the pleasure of putting your creative expression on paper. Let this be your new year resolution In the following, you can see how easy it is to draw simple bark texture and trunk with pen. Learn to draw other elements of nature with pen and ink and get started today. Have fun Rahul www.pendrawings.me Drawing a tree trunk with pen and ink Add a horizon with distant tree line and a scattered trunk or two and you have a simple landscape.
- 10 replies
-
- landscapes
- drawing
-
(and 3 more)
Tagged with:
-

A Course In Drawing P&i Landscapes: Week I
rahul_jain posted a topic in Fountain & Dip Pens - First Stop
I am very happy to announce release of completely free course for learning to draw pen and ink landscapes. You can get an overview of the course in this video and access the course here. Starting today, I will present activities from this course in my weekly posts. Do follow along and start your creative journey today. We start by looking at some of the choices for pens to use for drawing. As you become more proficient, you can try different choices, but to start with, it is sufficient to have a quality gel pen and a small sketch book to practice. In this video, I discuss some of the choices. Understanding some of the simple pen strokes that are used for drawing landscapes is very useful and we will do this next. In this online tutorial and video, you can study some of the basic pen strokes for drawing landscapes. Following is an overview of 'parallel line' stroke that we will practice this week. Do practice this stroke extensively this week as this is the most basic stroke in P&I drawing. ********************************************************************** Parallel Lines:This is the most important and basic technique to create a tone in P&I. Practice drawing lines equal distance from each other. It is important to make sure that your hands are not hesitant when drawing a line. In other words, DO NOT draw a line very slowly and deliberately. This will cause the line to have edges and bad impression. Instead, slowly bring your pen down to the paper and create a confident FLOWING line with a swift stroke. Don’t hurry it either. Key is to find the balance between slow deliberation and fast impatience to create a line that is confident and inviting. This will come with practice as every person has their own rhythm. Practice often and find your own rhythm. You will know when you get it. The lines also don’t have to be exactly parallel and equidistant. The key is to create an impression of ‘uniform’ tone with a set of lines. In other words, the deviations in the distance between the lines should be small enough so that our mind and eye don’t notice them. Instead our mind should instead see and focus on the lines as a whole to see a uniform tone. Initially, don’t attempt to draw longer parallel lines as this requires movement and control from the shoulder that takes more time to attain. Lines an inch or so long can be drawn using the movement of wrist and should be attempted initially. ********************************************** Have fun, Rahul- 3 replies
-
- drawing
- landscapes
-
(and 2 more)
Tagged with:
-
I have put together few videos that show drawing a simple landscapes in pen and ink in under 30 minutes. In addition there are also fully illustrated completely free tutorials to learn drawing landscapes in pen and ink. Here is a simple drawing that you can watch and try it yourself. This is completely drawn with a fountain pen. Any feedback and comment most appreciated. Have a creative weekend, Rahul
-

Drawing Landscapes Videos: Feedback Requested
rahul_jain posted a topic in Fountain & Dip Pens - First Stop
Hi, as a pen and ink artist, I am passionate about helping others adopt drawing simple landscapes with pen and ink as a relaxing and creative hobby.To that end, I have written a complete tutorial for beginners that I shared in this forum earlier. You can find it at here I have also created videos that show step by step drawing of a simple landscape in under 30 minutes. Here is a link to a video that demonstrates drawing the following. I would appreciate any feedback on the content and presentation in the video and if this is something you would like more of to help you in learning to draw with pen and ink Thanks Rahul Link to video showing drawing of following- 1 reply
-
- drawing
- landscapes
-
(and 1 more)
Tagged with:
-

Mini Landscapes To Practice Drawing With Pen
rahul_jain posted a topic in Fountain & Dip Pens - First Stop
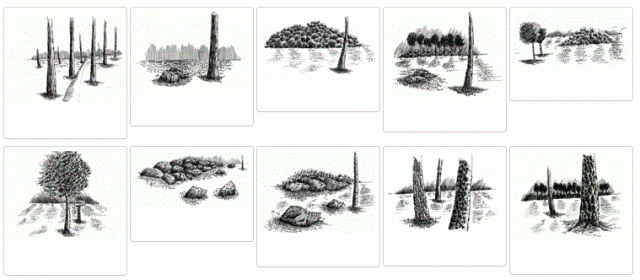
Hi, I have created over 20 mini landscapes that can be used to practice drawing with pen if you have never done it before. They are really fun to do and can be completed in little time. I also provide 'templates' with faint outline of the drawings that can be printed and used as a starting point. Fully illustrated step by step tutorials are also available to help you with your attempt. As a pen and ink artist, my aim is to help people discover the joy of doing simple drawings with pen as a creative and relaxing hobby. I invite you to try some of them today. Any thoughts on the content and suggestion for improvement is most welcome. You can access them here Enjoy Rahul www.pendrawings.me- 2 replies
-
- landscapes
- drawing
-
(and 1 more)
Tagged with:


