Search the Community
Showing results for tags 'eversharp'.
-
I have several Wahl Eversharps, but I had never seen one in which the nib said "flexible". Is this a common nib that I just hadn't seen? BTW, it is flexible and a good writer. Any info is very welcome.
-
I somewhat accidentally won an auction on eBay (bad things happen when you forget to put a period between the dollars and cents in your bid but luckily I won for not too much more than what I was willing to bid anyway) for an Eversharp and I have no idea what I actually bought. It's not a Skyline, but maaaaaybe it's one of the late model Symphonies? Low-resolution images are included in the post. Here's a link to larger images: https://imgur.com/a/85KRQ8Q. Details: Dark navy blue body, seems to be plastic, but it smells pretty bad and maybe feels...sticky? Might just be age and/or how it was stored, but I don't want to try to clean it until I have a better idea of what it is Screw cap Three cap bands; two narrow silver-colored bands on either side of a wide gold-colored band Gold-colored cap clip, no double-check warranty marks. Top imprint is, "MADE / IN / USA," followed by EVERSHARP stamped vertically down the clip 14k nib, a little flexy, with the Eversharp banner imprint, seems to be in fantastic shape Lever seems to be in good shape, haven't pulled the section yet The body is a little warped Measurements (very approximate): Capped: 5 1/2" (13.97 cm); 12g Uncapped: 4 7/8" (12.38 cm); 8g Cap: 2 3/8" (6.03 cm); 4g Nib: 3/4" (1.90 cm) Grip width: 1/4" (0.64 cm) Body width: 3/8" (0.94 cm)
-
Hi!. I own a beauty Wahl Eversharp desk fountain pen. It was a gift my mother received n the 1950's. I think it's an ebonite Signature model manufactured between 1920 and 1930, but im not sure. The base is engraved "WAHL EVERSHARP-GOLD FILLED MADE IN CHICAGO, U.S.A.". The nib "WAHL EVERSHARP, 14 K, 2". Somebody know something about?. Thanks!. Jorge.
-
Hello everyone... I have recently obtained an odd bird of an Eversharp Symphony -- my understanding is that the first-generation "500" models had the dramatic Loewy-designed caps with the offset halves and the creased clip peaking more sharply, but most indentifiably, no band around the cap base. I recently purchased an (admittedly pretty janky) version that I thought was interesting. Looks to be a first-generation design, but WITH a cap band. Also has the metal threads attached to the barrel (take my word) and a single banner nib with plain tines (photos if requested of any and all the above). A sort of transitional model? Anyone have an idea? Thanks! Matt
-
I wanted to share with you the repair of a a crumbled barrel end of a gorgeous oversize Wahl Eversharp Doric in cathay color. A soon as I get this pen (50$) I had the bad idea to push a little on the crumbled crown from the barrel end and boom, it broke up in pieces... Here is the initial state... I cleaned the end barrel removing all the crumbled celluloid. I decided to rebuild the Barrel end crown using another broken doric cap in cathay color (junior size) (also crumbled at the end): here is this cap (yellow arrow shows instable cracks, I got it on ebay for 30$): I first removed all the "unhealthy celluloid" (broken or crumbled parts) from the broken doric cap. I then used sand paper to remove the discolored superficial layer of the cap. Here is what remained of the cap: Then the barrel was split in half using a fine jeweler's saw and sawn the splited barrel in "tiles" of the width of the barrel end: here are the tiles: Then the tiles were flattened and glued together using acetone welding. You must immerge a short time each tiles in acetone to allow them to soften. The tiles are then ready to be assembled two by two by pressing them against each other. On the left of the picture you can see tiles already assembled and on the right a fresh one ready to be soaked in acetone and welded to the other ones. You then get a kind of celluloid dice formed by successive acetone welded layers: And now the hardest part!: you have to wait for 3 months to allow the dice to dry (to shrink). It's now time to acetone weld the dice onto the end barrel: Then the crown is sculpted, sanded it down to the 12 lateral facets of the doric barrel with rough sand paper. To guide you and to avoid damaging the lateral facets of the barrel you have to protect each facet with a piece of metal taped with double sided scotch tape onto the barrel facet: Here is the rough result on the left (without fine sanding) and with fine sanding on the right (up to 5000 grit sandpaper): When you have finished with sculpting the 12 lateral facets it's time to sculpt the crown (end side). You have to sand it using a metallic guide taped with regular tape on the lateral facets: After finishing and sanding using Micromesh (grit 8000/12000) here is the result: The pen after a year of use didn't show any signs of crumbling, there was no celluloid shrinkage either:
-
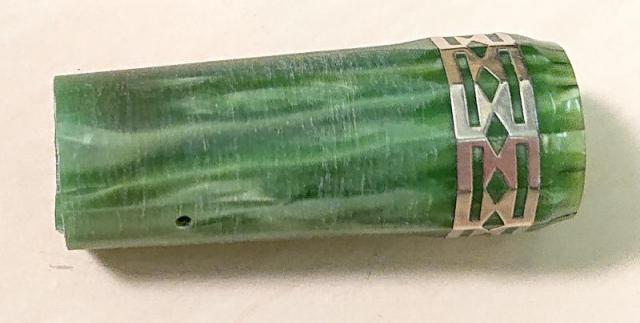
I was aware that the clear sections of the Coronet were temperamental, but I wasnt aware that the ends were subject to decomposition. Has anyone come across this issue? I have searched the forum, but didnt find any information. As with all pens that degrade, there may be no hope 😭😢
-
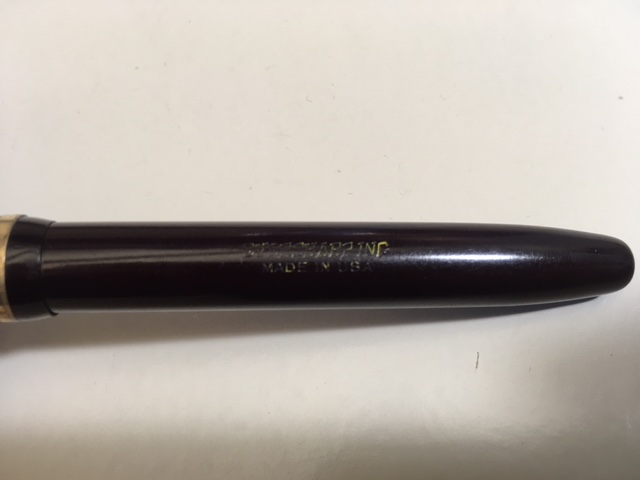
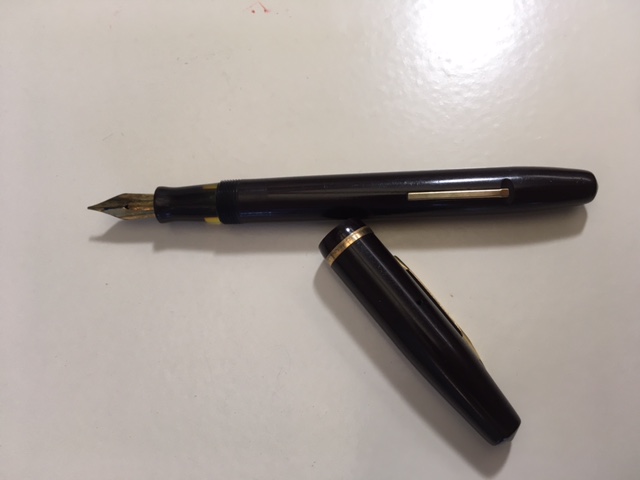
Hello Wahl Eversharp experts! I have acquired one vintage Wahl Eversharp pen, and hadn't had a chance to ask seller which model is this (see photos). It is probably 1930's or 1940's... maybe even later. I've tried to find some information online with no luck so far. I have another older pen, from 1910 or 1912, but it was easy to identify Tempoint pen with Penrite visible on the cap. But this one - except it is obviously a Gold Seal - no clue which model it is. So - if anyone recognizes it - by all means please share the info. Thanks!
-
-
Personal Point Equipoise Type 4B Going To Need Some Love
Addertooth posted a topic in Wahl-Eversharp
I saw this pen on eBay, and could not resist. It looks to need a new sac, a full polish and re-plating to fix all of the brassing, especially on the tassies (rings at both ends of the pen). This will probably take a few months of working with it a few minutes intermittently, but I suspect it will be rather nice when complete. If I have the identity wrong, feel free to straighten me out.- 4 replies
-
- equipoise
- personal point
-
(and 3 more)
Tagged with:
-
Hi all, this has to be the right forum to ask this question so I really hope to get some useful input. I've recently bought this Wahl Eversharp Doric 2nd generation, senior saphhire blue with no.9 adjustable nib and a shut off valve in tip top condition. It has its filling mechanism repaired by a renowned pen restorer very recently. The pen burps. I am trying to pin point the source of the problem. One thought is the obvious: there is a leak somewhere. Another is the possibility that ink remaining in the feed during filling, drops down eventually. Another possibility is that the pen is just like that. I wouldn't know because this is my only Doric. Another possibility is that the nib and feed aren't positioned properly. I cannot personally eliminate the first option. When I got in touch with the pen restorer, I got a very rude response and he was refusing to even consider the possibility or the need to look at the pen and even blocked me. You don't block someone with an item you're warranting. So I'm on my own for a while until I am able to get back in touch, but I need ideas as the problem could be somewhere else anyway. To eliminate the 2nd possibility, I cleaned up the nib and really well with a tissue draining most/all excess ink that could make the feed wet or saturated at all. I got good behaviour for a short while and put the pen to one side. The next day I picked it up, still with good behaviour, but the fluid is slowly starting to show accumulating under the nib. Total writing time is less than 5 minutes for both days. Third and fourth possibilities, I'll need your help with. Do Dorics burp naturally? Any ideas what it might be? What can I do at home to troubleshoot and try out where the leak is from? I have repaired pens and mechanisms myself, but I am not willing to even touch this pen with any attempt at disassembly long as there is a warranty on that repair. I hope someone can help me out get this pen figure out. It has been a very meaningful purchase to mark the end of a very exhausting 7 year journey, and I still haven't been able to use it or enjoy it, and even starting to feel I've been screwed (given the bad attitude coming from the repairer who was basically just being full of himself and his impeccable repairs).
-
Steps To Restore A Vintage Wahl-Eversharp For A Complete Newbie?
hu-327 posted a topic in Repair Q&A
I bought this pen on eBay recently and thought I'd stumbled on a wet noodle pen (seller had this in all caps in the title) for a steal at ~$62. Problem is, this pen is almost certainly not a wet noodle, as defined by going off of what I know of them, based on me trying to flex the tines (which are about as flexible as an Ahab (so not very flexible at all), and much sharper, for those wondering). There's a fair amount of scratching, damage, and bite marks to it, which brings me to my next point. The section and barrel won't come apart, and the lever filler clip stops at a certain point. As someone who is totally inexperienced with restoration, could I restore it on my own or would it be better to send it off to an expert? I could deal with the latter, but as a student, if it costs too much, I don't know if I can. https://www.fountainpennetwork.com/forum/uploads/imgs/fpn_1555954263__img_e4474.jpg -
Just bought my last Eversharp fountain pen - I think? My collection had ended after the Skyline and the Fifth Avenue, but now added the Symphony 701 (c1950), Ventura (slim sterling set, c1955) and finally a Point *7 c1964. The Point *7 was - I think - the last Eversharp branded fountain pen, from the then Eversharp Division of Parker? The Point *7 is not a stunning pen but it takes modern Parker cartridges and converters and is a very smooth writer.
-
Hello Everyone! I noticed this last Christmas when watching It's a Wonderful Life -- in the scene where poor George Bailey has come hat-in-hand to Mr Potter to ask for a loan, it caught my eye that old Potter was using an Eversharp Skyline. Others have noticed this but I went the extra step of doing some screen captures to show it. It's unmistakeable, and funny enough the black-and-whiteness of it reminds me of one of my favorite old Sheaffer's ads. All I have to add is, say, that better be an Executive Skyline, what with all the money you have, Potter! Can anyone via the pics (or by going to the original source) actually identify the model and pattern? I fantasized that I saw longitudinal stripes on the cap, which looks plastic to me... so I guess there's a chance it could be an Executive, since that size only came with plastic caps...
-
Hi Forum Folke, Can anyone give me some instruction on how the cap on a Skyline comes apart? I have one with a semi-mangled clip (the "ball" at the end that lifts the clip over the pocket edge has somehow been flattened pretty badly.) I can't figure out how the thing comes apart so I can get the clip off of the cap and straighten out the bent metal; I need direct access from 'beneath' the clip... can't do it on the pen. Thanks for any direction! Pics would be good, but I can probably follow a good text description.
-
Hello, First time posting here, and hoping the experts can help. I received a pen that previously belonged to my grandfather. The clip reads Eversharp and Skyline is printed along the barrel. It also reads 14k solid gold. I've been told that it was once part of a set that included a fountain pen, but unfortunately the pen has been lost. The barrel is perfectly smooth with no ornamentation of any kind. Any ideas on the age? Also, I've tried to find refill lead here but the largest the chain stores carry is .9mm and it keeps falling out - obviously, I need something larger. Thanks in advance!
-
Hello everyone! I have recently fallen in love with the Parker-Eversharp 10,000 Word Pen, which I think is so odd-looking it's beautiful -- it's like the Edsel of pens! At any rate, I wondered if the claim was true, and how to test it. I obtained some original cartridges, and then was so excited at the fact that I could buy some of the original Quink with Solv-X. The chemist in me is still fascinated by what Solv-X could actually be. I have one pen that came to me with cartridge attached and still with fluid, useable ink. It's just incredible to me that a product like ink could last so many decades, and still be useful and beautiful. "Does not dry in the pen" indeed -- one claim proved true from the outset! Anyone else with "historic ink" they like to use? Given this festive time of year, and the ability to count words quickly with a computer program, I selected 10,000 words of Dickens's _A Christmas Carol_ (all of Stave One, a little of Stave Three, and all of Stave Five) and decided to write a "love letter to Christmas," as it were. The pen was ready, the Quink took some filtering and dilution (with discovery of an incredibly pretty crystal! Solv-X? or just pigment?), and I set aside paper and time. Several beautiful nights teary-eyed at the beauty of Dickens's writing later, I had written 10,000 words with the namesake pen, and I still had more than 1/4 cartridge of ink left. Photos provided to prove all this, naturally-- I'm certain my micrographic printing helped, but also I think Dickens's writing has a disproportionate number of Very Long Words, so perhaps that balanced toward the other side of actual writing line length. (Pages are written double-sided) Merry Christmas to all, and God Bless Us, Every One! Matt
-
Wasn't sure exactly where to post this, and I chose the Parker forum, but figured other Eversharp lovers like myself might like to have a look at a post I did on the Parker-Eversharp 10000 Word Pen! https://www.fountainpennetwork.com/forum/topic/342182-can-the-10000-word-pen-really-write-that-much-merry-christmas/ Cheers, Matt
-
I have three Eversharp pens, two Skylines and a Symphony. All of them were bought in working condition, indeed the Symphony was from a supposedly never used batch that Peyton Street Pens had a couple of years back. Because they were working when I got them, there has never been any reason to take them apart. I did note, however, that the Symphony, although a very nice writer, didn't hold much ink. I hadn't used it in a while for that reason, but filled it a couple of days ago, only to have it go dry again today after light use. I can't say how many pages I wrote with it, as I was alternating with other pens, but we're definitely talking single digits. So I took out the section to have a look at the sac. It's in evidently good condition, and quite long, but by squeezing it I discovered for myself what a lot of other people already knew, that there is a breather tube running practically the whole length of the sac, and presumably taking up a lot of room. On the other hand, my two Skylines, which I'll assume for now have the breather tubes, seem to have much better ink capacity than the Symphony. Searching on this forum, I found plenty of topics on these breather tubes, such as this one, just to give one example. I learn something new every day. I'd seen breather tubes before in Parker 51 aerometric fillers, but hadn't run into them in lever fillers before. This leads to a number of questions. Is the breather tube actually a necessary part in the Eversharps? Will they work without it?Will they work with a shorter breather tube?Is it likely that the reason for the low ink capacity in my Symphony is the breather tube, or could there be other issues?Did all Eversharp models use these breather tubes?Are there other brands of vintage lever filler that used (and need) breather tubes? No hurry. I'm cleaning out the Symphony and putting it aside anyway, as there is another pen I want to use. I notice, though, that there seems to be another feature of this tube. It takes a lot more flushes to get a reasonable amount of the ink out of the pen.
-
New York Nº3 Original Nib In A Wahl Eversharp Gold Pen?
mresimulator posted a topic in Wahl-Eversharp
Dear all. I'm looking for a gold Wahl Eversharp epn. I found this (see attached file), but I see that include a New York Nº3 nib. Is that the right (original) nib? I can not see any 'Wahl' imprint on it, and I dont want to buy a pen with a replacement nib. Does some Wahl Eversharp gold pens include that kind of nibs? Regards, Wahl Eversharp pen nib.pdf Wahl Eversharp pen nib.pdf -
Here is a tutorial on how to repair a pen I love: Wahl Eversharp Doric Second generation with plunger Filler. Hope this could help the aficionados... And please forgive my bad English... Properties of the filling system: The filling system looks like early Onoto's: it is kind of "reverse syringe" called the "one shot vacuum filler" by Eversharp. To fill the pen you have to pull the piston syringe, then dip the pen in ink and finally push the piston: it fills with ink. When you push the piston, a vacuum is created behind the piston which is released as the piston comes close to the proximal end of the barrel which is larger. Anatomy of the pen (according to Eversharp's patents) : 1: Disk nut 2: Plunger disc 3: Plunger rod 4: Rubber plunger Washer #1 5: Cork plunger Washer 6: Rubber plunger Washer #2 7: Lock nut 8: Nib 9: Feed 10: Section 11: Section pin 12: Barrel 13: Barrel brushing (AKA "packing unit") 14: Banded sleeve 15: Barrel end ("piston button") Initial cosmetic aspect of the pen: Here is a second generation oversize doric with desirable garnet shell color, adjustable nib and plunger filler, unfortunately without the ink shut off device... Two main cosmetic problems for this pen: a dent on the section and some irregular aspects of the facets. First part: pen disassembly: A. Piston button unscrew: To unscrew the piston button, first twist the piston button counterclockwise to pull the plunger rod, then with a pair of pliers hold firmly the lock nut and unscrew the piston button counterclockwise. One important thing here: you have to note where exactly the lock nut is on the plunger rod to put it in the same place for re-assembly: if you don't do so you may experience ink flow problems of filling problems at the end of the repair. Then unscrew the lock nut. B.Banded sleeve removal: The banded sleeve is press fit onto the packing unit. To remove the banded sleeve I first use a thin scalpel blade between the barrel and the banded sleeve and carefully move my hand right to left to loosen the banded sleeve. Then when you manage to create a small gap between the banded sleeve and the barrel do the same thing with a thicker and stronger blade to farther loosen the banded sleeve. Sometimes the banded sleeve is too tight and you have to use heat to loosen it (see below on how to use heat with Eversharp's celluloids). C. Packing unit unscrewing: This is for me the most feared, most time consuming, and most critical step. Not done properly you can ruin the pen forever. Always remember that Packing unit unscrews CLOCKWISE!!! Be very, very patient: It usually takes one hour to unscrew, in my experience I almost spent a day unscrewing this pen part! The key to the success is to use heat, the aim of using heat is to soften the shellac used to seal the packing unit onto the barrel. You will have to heat and cool the barrel end up to 20 times (sometimes) to unscrew the packing unit. Always use dry heat (using boiled water will make a celluloid hydrolysis and ruin the pen), never use open flame as celluloid is a furiously flammable material. I personally use a machine used to bend glasses frames, but the most common tool used is a heat gun (ideally with a variable thermostat). On the other hand heating can bend or burn celluloid: to avoid this pitfall you must always keep an eye on the celluloid you are heating. A good trick is to use a sharp pool and to push it against the heated celluloid: as soon as the celluloid starts to melt the tool starts to sink in the celluloid: this is a good alert to stop heating and to wait the celluloid to cool. NEVER try anything (like unscrewing the packing unit) when the celluloid is hot: you will bent it forever. You must protect the rest of the pen from heat: I use a sheet of paper I wrap around the pen, and only let the part I want to heat unprotected. D. Nib section unscrewing: The section unscrews counterclockwise. You have to use heat to unscrew (Cf C.). If you use heat, you don't have to use players to grab the section and the barrel (scratching it...) to unscrew, fingers are sufficient!. E. Section disassembly: First you have to get the section pin out of the section: use a needle to push the pin. On the picture the pin is broken: you will have to make another one after... Then rock the nib and feed assembly out of the section, not by pulling it but pushing it from the section back end with a flat ended cylindrical tool (nail punch) and a hammer onto a nib block (Cf picture). If the feed and nib are stuck into the section, soaking the whole section overnight in water can help. F. Disk and Disk nut disassembly: Get the plunger rod out of the pen from where the section screws on the barrel. Use pliers to grab the disk nut and unscrew it counterclockwise, using heat can help (Cf C.). Get rid of the plunger disk remnants. G. Cap disassembly: Disassembling the clip from the cap seem to be a good idea but is impossible on second generation doric (unlike first generation where the clip can be disassembled by removing the inner cap) Second Part: Cleaning and Polishing: A. Barrel and cap cleaning and polishing: Dorics are faceted pens, traditional methods of polishing (machine polishing with discs for example) are not suitable as it would ruin the facets and make the pen round. Faceting the barrel seems to be a better option. I grind each facet of the pen with sandpaper, progressively increasing the grit of the sand paper: I start at 800 grit, then 2000 grit, and end at 5000 grit: the result is a high gloss facet with a nice geometric barrel. For each facet I put the sandpaper onto a flat surface (like a mirror) and rub the facet against this flat surface making movements from the end of the barrel to the tip of the barrel (I never do any rear movements from left to right). I decide to increase the grit only when the surface of the facet is evenly flat and ground. The inner surface of the barrel can be cleaned with a soft cloth with a mix of 50% domestic ammonia and water (use gloves it dissolves inks but also skin!). NEVER use steel wool on the inner surface to the barrel as it could scratch it and damage the filling system. You can do the same for the cap, but always protect the gold plated ornaments (clip and cap band) as polishing could damage them. To protect the ornaments simply wrap tape around them. Never try to polish the facet where are the cap imprints ("Wahl Eversharp made in USA") it will definitively erase them. B. Packing unit and screw thread cleaning: Using a kind of torn pin expel the old plunger washer (see on picture). Then clean the threads of the section, the threads of the barrel (at both ends), the threads of the packing unit: clean the remnants of the sealing material which are in the threads. You can use the torn pin to put it into the threads to clean them. C. Rest of the cleaning: Cleaning nib and feed can be done using a mix of 50% domestic ammonia and 50% water: soak the nib and feed for 30 minutes then use a tooth brush to clean the feed channels. Cleaning the cap can be done using the same mixture and a clean cloth put into the cap, but do not soak the cap into the ammonia solution as it could destroy the gold platting of the clip and cap band. Polishing the gold nib and the gold ornaments can be done using a clean cloth and polishing-cleaning solutions (Mirror etc...) Third Part: Re-creating the missing parts: A. Cork plunger washer turning: To re-create the cork plunger washer I use The cork sheets which are glued to the bottom of champagne corks (it is a very good quality cork with few holes for a good seal). Use a cutter blade to separate the cork sheet from the champagne cork then flatten both ends of this sheet with sand paper (600 grit is ok). Use a punch of a diameter above the inner diameter of the packing unit to cut a small disc. Drill a hole in the center of the disc with a thin drillbit (the diameter of the drillbit must be inferior than the diameter of the plunger rod to provide good seal. Then finally fine tune the external diameter of the disk twisting it against sand paper (600 grit). The disk should be pressfit into the packing unit. B. Rubber plunger washer turning: Two or three (depending on the packing unit depth) rubber plunger washers are generally used to provide a good seal. To recreate them I use a rubber sheet (bought on Ebay) of around 1mm thickness. I cut small disks of rubber using a punch with a diameter just above the inner diameter of the packing unit. Then I drill a hole in the center of the disk just below the diameter of the plunger rod. To fine tune the external diameter of the rubber disk I set it on the drill bit and make the drill turn with the disk set on it against sandpaper (600 grit). The disk should be pressfit into the packing unit. C. Plunger disk re-creating and fine tuning: Cut a rubber disk with a punch with a diameter just above the size of the inner diameter of the barrel. Cut with a punch, or drill a hole in the center of the disk (around 2mm diameter). Set the disk onto the plunger rod screwing the disk nut clockwise (you sometimes need shellac to lock the nut onto the plunger rod) until it is blocked onto the plunger rod and then fine tune it setting the plunger rod on a drill (Dremel for example). Fine tuning the plunger disk is the second most delicate step for repairing the pen (see second pic). The rubber disk should not be too large nor too small otherwise vacuum cannot be created in the barrel. To know wether the disk is too small or too large, put the plunger rod with plunger disk in place into the barrel, then push the plunger rod and watch the plunger disk through the ink window: if the disk slightly bents upwards: it is good, but if it stays bent downward it is too large. Then pull the plunger rod and watch again the plunger disk through the ink window: if it stays flat the plunger disk is too small, if it bents downward the plunger disk could be of a good size or too large. D. Section pin re-creating: I use a stainless steel rod to re-create the section pin: I use a disk sander to decrease the diameter of the rod, polish it with sandpaper, ad cut it to the size of the native section pin. I then place it into the section pushing it with a needle. The pin should not be too large otherwise there is a risk to destroy the barrel end threads. Fourth part: Re-assembly: A. Barrel reassembly: Put the plunger rod with the plunger disc in place into the barrel, put allot of silicone grease onto the cork and plunger washers, put the plunger rod through the washers, set the washers into the packing unit, put silicone grease on the packing unit threads, screw the packing unit counterclockwise until it stops, set the banded sleeve on the packing unit end (some of the packing unit must protrude through the banded sleeve). B. Piston button reassembly: Screw the locknut clockwise on the plunger rod and set it at the same place that it was before disassembly. Screw the piston button clockwise on the plunger rod and tighten it holding the locknut with a pair of pliers. C. Section reassembly: Put the nib on the feed at the exact position it was before disassembly (some marks can be seen on the feed). Holding the nib-feed between two fingers press-fit it into the section at the same position it was before disassembly. Then put some silicone grease into the threads of the section and screw it clockwise into the barrel. Fifth part: conclusion and troubleshooting: With this method Dorics can fill up to 80% barrel capacity (back to factory standards). If the pen does not sucks ink, many problems can be encountered: proceed as follows: - First the packing unit is not airtight: unscrew section and piston button and lock nut, then insert the plunger rod into the back of the pen, with your mouth "suck" the "section end" of the barrel, if the barrel stands sticked on your tongue or lips the packing unit is airtight. If not fine tune the washers or add another rubber washer in the packing unit or put more silicone grease. - Second the plunger disc is not airtight: put the plunger back in place (through the "section end of the pen") pull the plunger rod and push it slowly downward it you ear a "pop!" it is airtight, if not fine tune the plunger disk again. If the pen is too wet writer proceed as follows: - First: repeat the first operation for "pens does not sucks ink" and wait a long time the pen sticked on your lips: if vacuum breaks there could be a subtle air breach in the packing unit. - Second: it could be a nib/feed problem (check elsewhere on the forum). If you cannot pull the piston the the end of the barrel: It seems that the plunger disc is too large: fine tune it again!! Thanks you, hope it will help Doric lovers. If you need any advice on how to repair a broken doric adjustable nib slider please check: https://www.fountainpennetwork.com/forum/topic/316447-wahl-eversharp-adjustable-nib-slider-repair-technique/
-
The first hour was spent trying to get the lever and slotted piece that goes into the bottom of the barrel to stay together while trying to insert both at once. Then I found a work around online which ended up working on the second try and in less than 5 minutes.
-
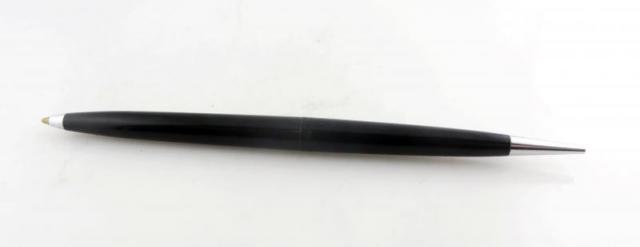
A Parker Eversharp Desk Set Ball Point Pen Box says "A Division Of The Parker Pen Company" so it must be 1957 or after. Does anyone have any experience with these? I have not seen one before
- 2 replies
-
- eversharp
- ball point
-
(and 2 more)
Tagged with:
-
Hi Guys, My name is Fred, I’m a newbie, and I live about 20 miles north of Chicago. My wife and I are planning to retire in the next few years so we are starting to prepare for it. Anyway, while doing so I came across one of my father’s old projects which involved building and selling fountain pen holders. Anyway, I now own a whole bunch of Eversharp Manifold Medium pens. Virgins, I suspect. (That can’t be the right word. What is the right word for a pen that has never been used? Do pens need to be broken in?) So, I’m going to try writing with one of the pens to see how it feels and looks. (Does the ink I use matter? What’s a good ink for my pen? But that still leaves me with a bunch of Eversharps that I don’t need. I figure that if I find I like writing with a fountain pen, but I don’t like the Eversharp I can use that money to buy something better. So, how do I sell these things? (I assume they’re worth something. Are they?) My only ideas are to use ebay or, maybe, put up a card table in front of my house and sell them there. Eversharps and lemonade, maybe. Any better ideas? Anything I should try to find out about my pens before I try to sell them? My thanks in advance for any help any of you can give me. Even by newbie standards I’m a newbie. I’m a pre-fetus or something. Anyway, thanks, Fred
-
Hi all, here I am again with a new restoration project. This time the pen is an Eversharp Kingswood, probably from the fifties (anyone can confirm this?) The pen is a button filler and it needs the usual treatment: new ink sac and body cleaning. The main questions are about the cap: - Is the clip original? The ring that hold ot is a little greater than the cap and it moves a little. Looking closely you can see it is a little larger than the cap diameter. - How can I remove the black top from the cap, in order to clean everything in the better way? I've tried to keep it in the water and to warm it with an hairdryer, but it does not move... any suggestion? And then the pressure bar: it has some rust. I'm trying to remove it with acid, dipping it in vinegar for a week, and then I'll neutralize acid residues with water and sodium bicarbonate. Do you think I'm doing anything wrong? Thank you, Matteo
-
I recently bought a second generation Doric oversize with gorgeous No 9 nib. When I disassembled the pen for cleaning, I was disappointed to find that the slider was broken and that the little tabs which kept the slider in place was missing: I decided to sen it to a nibmeister I know in Spain but he told me that it was impossible to repair, I then tried to send it to very famous nibmeisters in the USA but it was the same answer... So I decided to repair it myself. The first thing I did was to weld little pieces of 900 silver just on the little prongs that hold the nib in place, but the repair was not solid enough and broke. Then I tried this technique which worked for me resulting in a working slider which does not breaks (after a month of use): here is the result: Technique: The first step was to "re-create" the little prongs that hold the nib in place. I decided to laminate a silver coin in 900/1000 silver to a thin sheet: here are the steps, I used the gas torch to soften the silver to roll it to a thin sheet: I then cut the sheet with office scissors to a little rectangle and then to a thin stripe: I then cut this strip again with office scissors in 4 and checked if they fitted into the original little tabs which were underside the nib which secures the slider in place (seen at the right in the pic): The second step was to prepare those strips to be welded to the original slider. For that I decided to glue the tabs to a piece of fire brick. This piece of firebrick should be of the same width of the gap between the two slits of the nib: To cut the brick I smashed it with a hammer first: Then I used a rock file (tungsten carbide file) to shape it: Here is the result: Then I temporary glued the 4 little strips I made in the first step to the piece of shaped brick, the distance between the strips must be the same between the prongs of the slider: To allow the strips to stay in place when using heat (when welding) I put some plaster around the base of the piece of fire brick using a cut "bottle cap": When the plaster was dry I removed the plastic cap: I the left this rest for 5 days to let the plaster completely dry. The Third step was to prepare the slider to be welded to the little strips: I filed it down with a narrow file to create a shallow depression of the thickness of the strips: I then checked if those "depressions" fitted the gap between the 4 stripes I glued to the piece of firebrick: The Fourth step was to hold my breath and prepare myself to welding with a little gaz torch arghhh !!: I put some solder flux on the place where the slider touches the strips (not too much and not underside the slider): I then put on the droplets of solder flux some extra thin tabs of brazing material: I used the little gaz torch to weld everything... and here is the result!: I cleaned the oxidyzation with steel wool. The Fith step was to recreate the missing little tab that secured the slider under the nib: I used the same laminated sliver sheet I already used for the strips that I cut with office scissors. To create the holes in this little piece of metal it was impossible to drill because the drill bit were too thick. I used a chisel narrowed to the width of the strips to create the holes: I then filed down the piece of metal to the size of the original tab and created nicer holes with a thin jeweler saw: The final step was to get everything together: I cut the excess of length of the strips and adjusted them to fit into the slits of the nib, and I folded the freshly made prongs underside the freshly made tabs and here we go!!! Be careful you can fold the metal only once or twice, when you try to do more it breaks!!! Thank you, hope this will help doric lovers! Jeremy Hardy.


