Search the Community
Showing results for tags 'electroplating'.
-
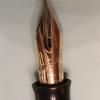
I posted this in the Waterman forum as a response to someone who was concerned about brassing on his celluloid bodied pen clip. I thought it might be of use to the entire forum. So I post it here. Home plating is not difficult. The hardest part is the surface preparation of the metal before the plating. Before you get started, mask any areas which you are NOT plating. It protects those other parts from physical abrasion and chemical attack. Step 1, get it smooth, often that rolled gold finish has a sharp edge and the underlying brass is intentionally rough, to enhance adhesion of the rolled gold to the brash. Polish it all until it is equally smooth, and no apparent transitions from where the rolled gold remains, and where it has worn/torn away. Step 1b, if any original engraving was obliterated during the polishing phase, restore it. There are two general families of engraving. The first is machine or displacement engraving (stamping, rolled imprint, diamond stylus) which pushes the metal out of the way (like a bulldozer) but does not remove it. The second is classical chisel style engraving, which actually carves metal away. The latter type is seen in some of the precious metal bodied pens which have artful hand engraving on them. Step 2, clean, I mean super meticulously clean, with the masked off parts safely covered, get them visually clean, then don latex gloves, get out alcohol wipes, then wipe the surface down (you are about to plate) to remove any oils your skin put on the metal. Residual oils can interfere with the plating process. Rinse the surface with distilled water to remove any trace of what was left behind by the alcohol wipes. Step 3, Plate, basic gold kits are less than $100, and you can buy the replacement "plating solution" for about half that price. In your application, you will likely want "brush plating solution" as versus "dip solutions" which require immersion. My photos below are using the dip method. Step 3b, rinse, rinse rinse, rinse all of that plating chemical off your pen. It may affect color or other characteristics if left in place. Step 4, With a jewelry cleaning cloth, buff aggressively, the initial finish after plating will look rough and discolored. Only with buffing will your initial horror abate. The underlying brass contaminates the solutions and places a layer of rough dark copper on the surface (you will believe something went horribly wrong with your plating). Did I mention buff with a jeweler's cloth, yes, I meant it. Step 5, Admire. Below is an example of a practice piece which was only lightly cleaned, there was no pre-plate polishing (no Step 1 was performed, for test reasons, I wanted to evaluate adhesion with poor surface preparation). Then the part was plated for about 30 minutes (at 140 degrees F) and the plating solution was carefully rinsed away, so it would not chemically attack the other parts over time. It was buffed with a jewelers cloth. Pictures: Before Plating, During Plating, After Plating. Once again, this was initially a parts pen purchased for $53 to do cruel experiments on, pity it not. Note the extensive Brassing in the Before picture (the first picture). Due to the lack of surface polishing before the plating, you can see a change in smoothness in the plated areas, as that area was rough brass instead of the glossy rolled gold. This is to be expected if you skip the surface polish stage prior to plating.

