Jump to content

Lever Pin Broken Out Of Celluloid - How To Repair?


BamaPen

Recommended Posts

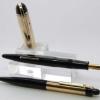
This is a 1930 Sheaffer KT74D desk pen. They only made these "Balance" desk pens for a very short time - I suspect that the depression caused them to greatly reduce the number of models they were planning to make.


I have one good one (see pictures) and one in which the pin on which the lever pivoted has broken the celluloid out - it goes thru the celluloid on these early pens (see pictures). There is still a slight amount of celluloid completely bridging the pin hole on one side and only a very small amount of overhang over the pin on the other side.


When I got the pen the ink sac was rock hard, so it is pretty obvious that someone pulled up on the lever against that immovable sac and ripped the pivot pin right out. With a new sac in place, the lever actually works because the tiny amount of remaining celluloid holds the pin in place, although it would not take much to break the remaining bridge or overhang.


I have some Loctite 480 that I have used successfully to repair cracks in black hard rubber pens. Before I try it on this I thought it best to seek suggestions on repair material.


So help Please!!


fpn_1461610402__sheaffer_k74dk_black_and

fpn_1461610446__kt74dk_lever_pin_problem

The Moonwalk Pen - honoring Apollo lunar landings
4-x-2-advertisement-copy-reduced-size.jp

Link to comment
Share on other sites

  • Replies 4
  • Created
  • Last Reply

Top Posters In This Topic

  • BamaPen

    3

  • Ron Z

    2

You'll either need to find a good black epoxy, or fill with celluloid, and then blend the repair. Loctite 480 is still a cyanoacrylate, which I would not trust. It really isn't designed to fill a gap like this.

spacer.png
Visit Main Street Pens
A full service pen shop providing professional, thoughtful vintage pen repair...

Please use email, not a PM for repair and pen purchase inquiries.

Link to comment
Share on other sites

Ron Z,


I read your comment and decided to ignore it - at my peril, of course - and I learned that once again you are right!


I had the Loctite 480 on hand, so decided to try it anyhow. I filled the gaps with it, let it set for two days (maybe not long enough?) and reinserted the lever and pin. Without the sac it was fine, but with a new but empty sac I could see that the Loctite was bulging slightly. I peeled it out of the gap rather easily, so I am back to square one.


This time I WILL take your advice and use epoxy. Two questions, though:


1. do i need to clean the surfaces of the gap now that I have contaminated them with Loctite 480, and if so, what should I use for this?


2. the gaps are small and somewhat v shaped. Should they be enlarged and if so, what shape should I try for?


Thanks in advance,

John

The Moonwalk Pen - honoring Apollo lunar landings
4-x-2-advertisement-copy-reduced-size.jp

Link to comment
Share on other sites

Enlarging the hole a bit and cleaning the contaminated surface can be done at the same time. I would use a very small burr in a Dremel or flex shaft tool at relatively slow speed. Don't do too much though. Just a bit. You'll have to drill the hold through again. Most of the time levers were held in with 0.025" piano wire, which you can find at a hobby shop. If you feel like taking a bit of a risk, you could coat a piece of the wire with silicone grease, wipe off the excess, and lay it in where it should go. Part way through the cure, gently pull the wire.


Note that in most cases, if you warm the repair area to 120F (no more) you cut the cure time to 1 hour or so VS 4 hours and 24 hours to full strength. Half an hour at that rate would be the ideal time to gently pull the wire out. An inch or so over a 75w equivalent CFL bulb is about right.

spacer.png
Visit Main Street Pens
A full service pen shop providing professional, thoughtful vintage pen repair...

Please use email, not a PM for repair and pen purchase inquiries.

Link to comment
Share on other sites

I occurred to me that no matter whether I use epoxy or whatever to fill the broken-out area, it will be under a good bit of stress in use. I decided to try a mechanical repair by making a reinforcing band out of 0.003" steel. I formed the band to fit around the inside of the barrel, with two tabs sticking up along the sides of the lever slot. I drilled a suitably sized hole in the tabs to line up with the broken-out holes in the celluloid for the lever pin.


I fiddled the reinforcing band around the inside of the barrel, lined up the holes and fitted the lever in place. It was a tight fit, but still moved easily.


With the metal tabs to take the operating forces, I could then fill the broken holes more cosmetically rather than trying for strength. I used my Loctite 480 since it is black and matches the black of the barrel rather well.


The pictures below show a sketch of the reinforcing band (I failed to take a picture of it before I put it in place) and a shot of the pen immediately after I applied the Loctite 480 to fill the cracked area. You can see an edge of the band on one side of the lever - not quite as smooth as I had hoped, but I plan to blacken it - and the Loctite fill, which after it has set I will attempt to smooth using micromesh.


Inside the pen, the band lies flush against the inside of the barrel and the ink sac slides freely through it.

fpn_1462020432__reinforcing_band_copy.jp

fpn_1462020923__repaired_pen_copy.jpg


The Moonwalk Pen - honoring Apollo lunar landings
4-x-2-advertisement-copy-reduced-size.jp

Link to comment
Share on other sites

Create an account or sign in to comment

You need to be a member in order to leave a comment

Create an account

Sign up for a new account in our community. It's easy!

Register a new account

Sign in

Already have an account? Sign in here.

Sign In Now


×
×
  • Create New...